Yoga is a great low-impact way to strengthen your muscles and help your body stay flexible. But many of the yoga poses require you to be able to sit in a crossed leg position. What if you can’t cross legs and want to do yoga?
It is possible to be able to do yoga even if you can’t cross your legs. There are several poses that are in a standing or laying down position that you can try. Here are 12 friendly yoga poses (yoga asanas) you can perform without having to cross your legs.
- Mountain pose
- Tree pose
- Chair pose
- Cat-cow pose
- Puppy dog pose
- Downward dog pose
- Warrior two pose
- Triangle pose
- Bridge pose
- Corpse pose
- Various aids
- Breathing techniques
Practice the Mountain Pose
You can easily practice the mountain pose, even if you aren’t able to cross your legs. The Mountain Pose is one of the most basic yoga poses. You can practice this pose anywhere because it’s so simple.
You do this by:
- Start in a standing position.
- Spread your feet shoulder-width apart. You can vary this by placing your feet side by side, the inner part of the feet touching each other.
- Ground your feet by balancing on your heel.
- Anchor the front of your feet by concentrating on the big toe and the little toe at the same time.
- Make sure your shoulders and hips are aligned over your feet in a balanced line.
- Drop your tailbone down to lengthen your spine. Imagine a fishing weight attached to it.
- Center your shoulders between your body in a neutral position.
- Your head should feel light and shoulders relaxed.
- Breath in and out slowly and hold this position for as long as you can.
- Then relax your whole body.
Practice the Tree Pose
Practicing the tree pose is excellent if you can’t cross your legs, because you do this while you are standing. This requires you to balance on one foot while keeping the other elevated. If you have trouble doing this, use a yoga block or rolled towel to support your elevated foot as an assist.
- Plant one foot firmly on the ground. Make sure the weight of your body is transferred to that foot.
- Make sure your body is centered and aligned, so you can balance easily.
- Lift the other leg up and open it like a gate so that your knee is off to the side.
- Press the bottom of your foot to either your calf, below the knee, or to your inner thigh, above the knee. Avoid the knee joint.
- Make sure to press the two together so you feel the resistance in your muscles.
- Keep your hip bones pointed forward.
- Press your palms together in a praying position and keep your shoulders dropped.
- You’ll feel everything pressing toward your midline.
- Keep your gaze focused ahead.
- Take three deep breathes.
- To relax out of this pose, move your elevated leg to “close the gate” and drop your foot down.
Practice the Chair Pose
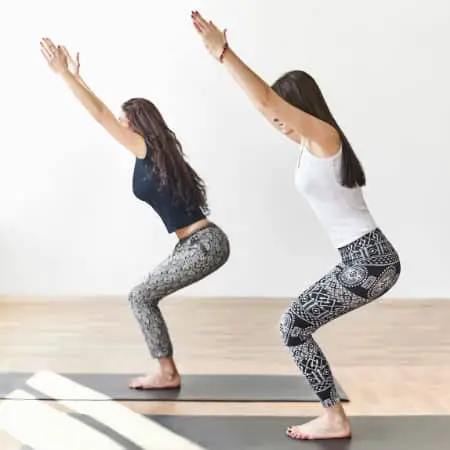
Practicing the chair pose is done while in a standing position. It strengthens your core muscles while helping you do cardio. It’s like pretending you’re sitting on an invisible chair.
- Stand in a neutral position with your body balanced.
- Keep your feet at shoulder’s width apart. You can also keep them close together for more support.
- Lower your body as if you are getting ready to sit in an invisible chair.
- Transfer the balance to your hips and heels.
- Inhale while you lower your body.
- Reach your arms above your head and place your palms together. You can also keep them parallel if this is more comfortable.
- Hold the pose for as long as you can for up to a minute.
- Inhale and exhale while holding the pose.
- To relax out of the pose, stand up while inhaling.
Practice the Cat-Cow Pose
Practicing the cat-cow pose is useful because it’s one of the basic staple yoga poses. It helps to stretch your spine in a relaxed way. You’ll be able to transition to other yoga poses from the cat-cow pose. Start by:
- Kneeling on the ground with your hands and feet parallel to the ground.
- Anchor your weight through your hands and feet.
- Make sure your shoulders and hips are aligned.
- Turn your body into a stable table, keeping hands and feet under your shoulders and hips.
- Start with the cow position while you inhale.
- Press your belly to the floor and lifting your gaze to the ceiling.
- Then go into the cat position by arching your back on the exhale.
- Push your spine to the ceiling, creating a nice C shape with your body.
- Move seamlessly from the cat-cow poses while inhaling and exhaling.
- You can press your toes to the floor during the cow pose and rest them flat during the cat pose to help stretch your hamstrings.
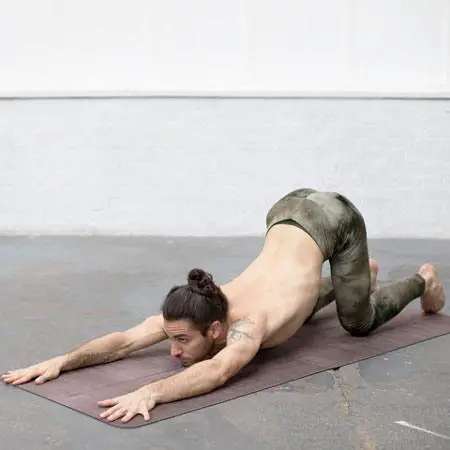
Practice the Puppy Dog Pose
Practicing the puppy dog pose is good for opening up your shoulders and chest. It helps you relax your upper body muscles. This is an easy pose to transition to from the cat-cow position. You do this by:
- Kneeling on the ground with your hips and feet parallel to the floor.
- Rest your weight on your hands and knees.
- Extend your arms out until your forehead is toward the floor. You can support your head with a block or rolled-up towel.
- If it hurts your shoulders to keep your arms straight forward, spread them out.
- Make sure your palms are flat on the ground.
- Keep your spine aligned all the way from your head to your tailbone, if possible. If this is too difficult, lift up slightly, so you aren’t pressed so far into the floor.
- Inhale and exhale slowly.
- Imagine yourself melting into the floor.
- To relax out of this position, rock back onto your hands and knees.
If kneeling on the floor is too painful, then consider using a chair to help you while standing.
- Stand up with your feet planted firmly on the ground.
- Bend at the waist.
- Use the back of a chair to support your hands
- Press into the shoulders to stretch them.
Practice the Downward Dog Pose
Practicing the downward dog pose is good for stretching your legs and shoulders. This position is a natural transition from the cat-cow position. Start this by:
- Resting on your hands and knees in a tabletop position.
- Make sure your hands are flat on the ground, fingers spread out.
- Plant your shoulders firmly over your hands
- Keep your hips and shoulders aligned.
- Slowly stand back on your heels until your legs and arms are fully extended.
- Make sure your head is dropped down until aligned with your spine.
- Pull your belly button in toward your spine to lengthen your hamstrings.
- Your heels don’t have to be fully touching the ground unless you feel comfortable doing that.
- Inhale and exhale slowly, allowing your body to stretch into the pose.
- To relax out of the pose, lift your heels up and drop to your knees in a tabletop position.
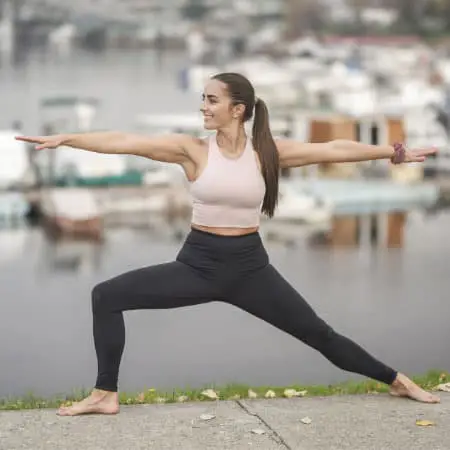
Practice the Warrior Two Pose
Practicing the Warrior Two pose helps with your balance and breathing. And you can do this yoga pose even if you can’t cross your legs. This is a pose that you can transition into from the downward dog pose very easily. You start by:
- Position yourself into the downward dog pose
- Lift your right foot up off the ground, keeping your hips straight.
- Curl your right foot against your body
- Bring your right foot forward as you push up on your left foot until you’re standing on your toes.
- Position your right foot facing forward between your hands
- Look down between your body and look at your left foot.
- Plant your left foot facing perpendicular from your body
- Make sure your right arch is in direct alignment with your left heel.
- Begin to stand by reaching forward with your left hand, lifting over your head in a circular position.
- Let your right hand naturally follow until your body is fully erect.
- Your arms should be horizontal to the ground and fully out – kind of like a surfer riding the waves.
- Straighten your right leg
- Then move your body until your right leg creates a 90-degree angle.
- Let your gaze go directly over your front hand, straight over the middle finger.
- Make sure your spine is fully aligned over your hips, and everything is balanced.
- Press into the stance so that you stretch your inner thighs.
- Inhale and exhale while you hold this pose as long as possible.
- To relax from this pose, come to a standing mountain position.
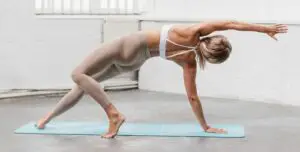
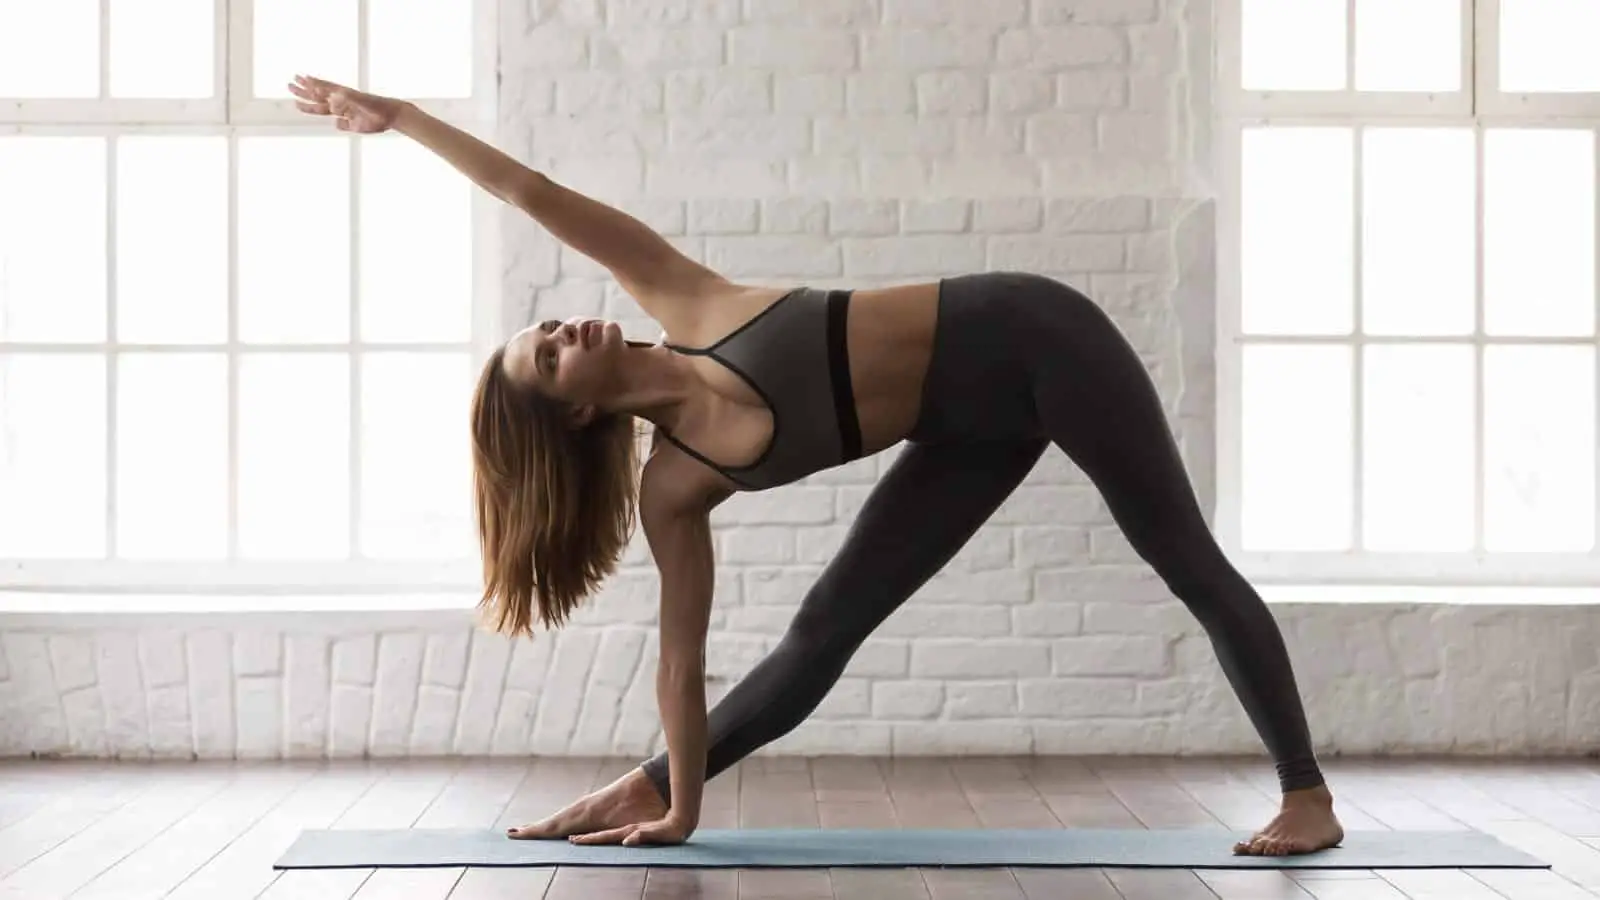
Practice the Triangle Pose
Practicing the triangle pose is a little more difficult than some of the basic poses. It helps you get your alignment in place and practice balance. This is a pose you start by:
- Standing erect with your feet spread apart. The wider the stance, the harder the pose.
- Imagine your legs as the two long sides of a triangle, with the ground as a base.
- Stretch your arms parallel to the ground.
- Turn your right foot 90 degrees, perpendicular to your body.
- Turn your left foot about 45 degrees so that it’s pointing in an angled direction.
- As you began to bend to the right, press your hips back to the left as your right arm extends forward.
- Bend your hips, so your right side is facing up.
- Place your right hand on the floor outside of your foot. If this is too hard for you, place your hand on your shin or somewhere else that is more comfortable.
- Stretch your left hand toward the sky with your palm facing forward.
- Create a nice straight line in your arms; imagine a pole running through them to the ground.
- You can keep your face in a neutral position or turn it toward the sky if you feel comfortable.
- Make sure your chest is facing forward.
- You can practice this about an inch away from the wall if you need help with your alignment. This is also an excellent way to help maintain your balance if you’re unsure.
- Inhale and exhale while holding the position for as long as possible.
- To relax out of this position, lift your body to a standing position while inhaling and straighten your feet.
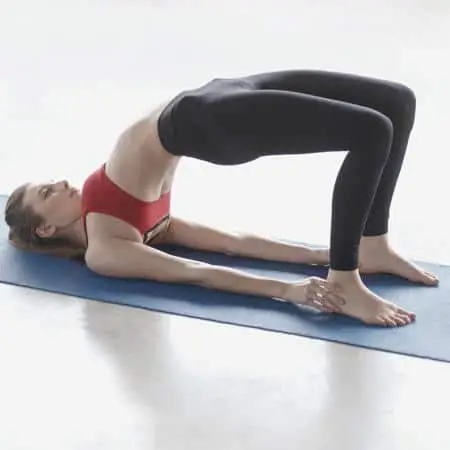
Practice the Bridge Pose
Practicing the bridge pose is very easy because it doesn’t require you to cross your legs. It’s very low impact and helps you stretch your spine. Start this pose by:
- Lay flat on your back with your feet planted on the ground
- Make sure your feet are aligned with your shoulders.
- If you can, see if you can touch your heels with your middle fingers.
- Push your tailbone to the sky and allow your stomach muscles to tighten.
- Inhale while doing this.
- Your shoulders will drop to the ground.
- Do your best to reach under your body with your hands and clasp them together.
- Imagine a beach ball is resting under your tailbone and held in place by your hands.
- Press your hands together and your heels into the ground.
- If reaching under your body is difficult, press your hands to your sides, palms facing the floor.
- Spread your fingers out.
- Inhale and exhale while holding this position for as long as possible.
- To relax out of this position, release your hands and place them along your sides.
- Roll your body back to the floor, starting with your chest and ending with your tailbone resting on the floor.
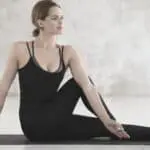
Practice the Corpse Pose
Practicing the corpse pose is important because it helps you with being still and meditating. This is hard to do only because it might be hard to still your body and mind. This is the best pose to end your yoga session with. Start this pose by:
- Resting on your back, flat on the ground.
- Let your feet rest comfortably on the floor.
- Grasp your hips with your hands
- Press your tailbone to the floor to feel your spine elongating
- Stretch your legs out, one at a time, until your heels are resting on the floor
- Rest your arms on the ground at your sides, palms facing up.
- Close your eyes
- Still your mind and focus on your breathing
- Starting with your toes, slowly relax each part of your body
- Letting yourself melt into the floor, as if your body had weights
- Let your breathing become soft and slow
- Remain in this relaxed position for at least five minutes and up to fifteen minutes
- Awaken your senses by moving your fingers and toes
- Roll to your right side and slowly rise to a sitting position.
- Open your eyes and allow yourself to engage the world.
Use Various Aids to Help Your Yoga Pose
There are various aids you can use to help your yoga poses. Some people need extra help balancing or supporting their body during a yoga session. Here are some aids you can use:
- Yoga Mat –This is the most basic and essential tool in your yoga kit. Besides providing a cushion to rest, it also gives you traction, so you don’t slip during those complicated yoga poses.
- Yoga Chair – Use a sturdy chair to help maintain your balance or try modified yoga poses.
- Yoga block – Yoga blocks can aid in supporting your yoga pose. Use them under your hands and feet to help maintain the proper body alignment.
- Rolled-up towel – You can use a rolled-up towel to help support your yoga pose and on the mat for an extra non-slip surface. Or as a quick go-to for wiping sweat away.
- Stretch Bands – These are good to help maintain a yoga pose for an extended time or give you that extra stretch during your session.
Practice Proper Breathing Techniques
One of the basic elements of yoga is proper breathing techniques. Knowing how to breathe right and when to breathe during your yoga session enhances each pose and helps to clear your mind. Here are some good yoga techniques:
- Be aware of your breathing. Be still for three minutes and observe when you exhale and when you inhale. This helps you slow down. It can be useful when you’re feeling stressed.
- Try deep, slow breathing to open your lungs and diaphragm. Inhale deeply through your nose and slowly exhale through your mouth with a whispered drawn-out “haaaaa” sound. Or keep your mouth closed and exhale through your nose. Try opening the back of your throat during this time. This is referred to as ocean breath.
- To calm your body, do breath retention. Do this by inhaling deeply through your nose until you fill your lungs and hold your breath for about three seconds. Then inhale again to fill your lungs and hold it for as long as possible before exhaling. This supplies more oxygen to your blood and helps focus your mind.
- To energize your body and mind, try Breath of Fire breathing. To start, inhale deeply and exhale slowly. Then inhale deeply again, and exhale rapidly. Force the air out by pulling your stomach in. Do this about 30 times.
Whichever breathing technique you choose, pair it with a pose by inhaling during the lifting movement and exhaling during the downward or forward movement. It should flow organically.
By following these 12 friendly yoga tips, you should be able to do yoga easily without having to cross your legs.