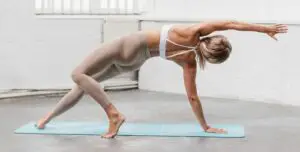
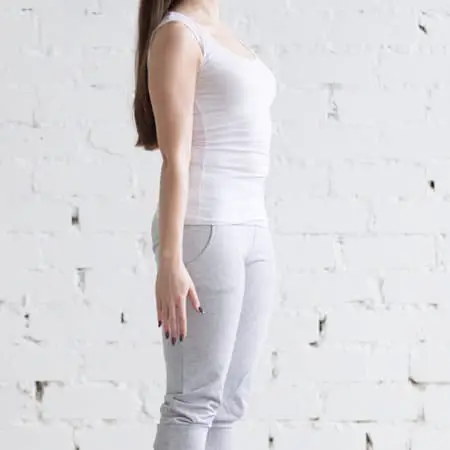
Mountain pose (Tadasana) is one of the most important poses in yoga, if not THE most important when it comes to improving your practice. If you really take the time to master your mountain pose, you will find that other poses come much more quickly and naturally to you.
Standing mountain pose is the foundational pose upon which all other standing poses are built. It improves posture and balance. To do the mountain pose, you must correctly adjust your feet, ankles, calves, knees, quadriceps, pelvis, abdominals, ribcage, sternum, chest, shoulders, neck, and head.
That’s not to say the other poses will be easy, (in fact, quite the contrary)! But it will definitely make it easier for you to learn them once you have mastered the foundation. Think about it like building a house – if you try to build the frame, walls, roof, etc., without first building the foundation, it’s going to come crashing down at some point.
Mountain pose places a heavy focus on what is scientifically referred to as the anatomical position. Everything is facing forward, in a neutral position, with all of your muscles gently working, but also finding release and decreasing tension and pressure. It may look very simple when you see someone practicing mountain pose, but I think you will find that there is a lot more to it than meets the eye.
Let’s get started!
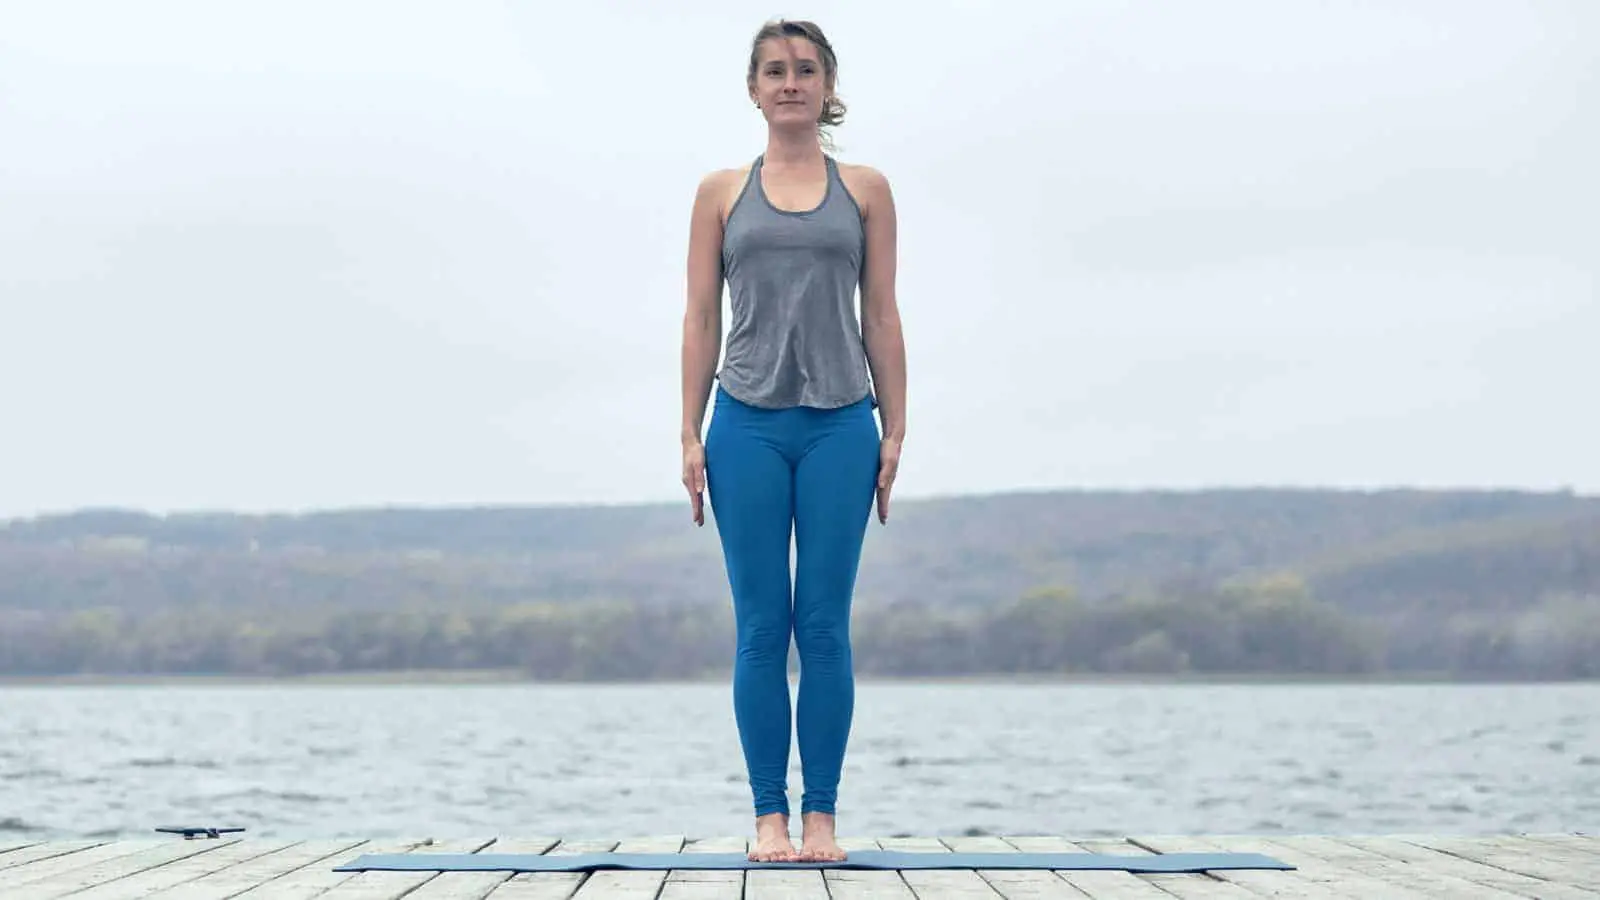
How to Do Standing Mountain Pose
Since there is so much going on in the standing mountain pose (Tadasana) position, we are going to break it down into smaller pieces so you can really get the idea of how it should feel. We are going to start from the ground and work our way up through each body part and the specific ways in which each part should be engaged in the pose. Feel free to try it as you read along, or wait for the review portion at the end of this section.
Feet
Start in a standing position and look down at your feet. You want them to be hip-distance apart, meaning they are on the ground directly below your hips. There are several different schools of thought regarding foot positioning for mountain pose, such as hip distance, toes together/heels apart, etc. When your feet are closer together, it creates a narrower base of support, which is generally more difficult for beginners, so we are going to focus on hip distance for now.
Once you have determined that your feet are hip distance apart, look down at them again. This time, you’re looking for the outside edges of your feet to be parallel to the sides of the mat. You may have to rotate your heels out away from the midline just a bit in order to get into a parallel position, which might feel a little pigeon-toed at first, but you will become accustomed to it over time.
The next step in getting your feet balanced and ready is to try to lift your toes up off the mat. Many beginners or people who are tight in certain areas may struggle with this just a little bit, so don’t feel discouraged. Just try to lift all five toes off the mat and then place them back down again. Do this several times until you feel that you have activated those muscles and loosened up any tightness.
The final piece of the foot puzzle is to sway forward and back a little bit, allowing the weight to transfer between the toes and the heels. Be mindful not to come up onto your toes or kick back onto your heels during this exercise. You are simply distributing the weight across the entire foot to give yourself a more grounded foundation for the pose.
Once you have completed all of these steps, you should feel all four “corners” of your feet really grounding down into the floor, mat or Earth. You should feel the big and little toes pressing down, as well as both sides of each heel.
Ankles and Calves
After getting the feet grounded and set to go, we will move up into the ankles and calves. The ankles actually play a really important role in mountain pose, which is to help you find the arches in the bottom of your feet. By lifting your inner ankles, you will feel the arches engage.
Think about your inner ankles pulling in and up just slightly in order to activate those arches. Try to feel your muscles engage in lifting the ankles up just slightly, so they are not slumping down into your feet and causing the arches to flatten out. This may seem really abstract right now, but the more your practice, the more you will start to feel it and become aware of it.
Your calves should be activated during mountain pose, as well. We do this by imagining that there is a ball between your shins, and you are squeezing in towards the midline with your shins in order to hold that ball in place. This is not a dramatic or exhaustive squeeze. It is just enough to keep your imaginary ball in place and to complement the balance of your feet and the activation of your arches.
Knees
Now let’s talk about what your knees should be doing. If you’ve ever seen someone in a mountain pose, it might appear that their legs are perfectly straight, which is true but only to a point. What you want to be careful of with your knees is hyperextension.
The hyperextension of the knee means that your knees are locked out and almost bending backward a little bit in the opposite direction that the knee joint is supposed to bend. To avoid this, try to take just a very slight bend in your knees.
In many studios, you might hear the cue “soften your knees”. This is exactly what they are talking about. You want to soften the bend in your knee ever so slightly in order to avoid locking them out.
Your knee caps are also going to lift up just a little bit, but that is caused by activating your quadriceps, which we will talk about next.
Quadriceps
Your quadriceps, or “quads,” are the four major muscles running across the front of your thighs. They are the largest muscles in your body. Your quads are responsible for a huge amount of your daily movements and are a critical part of a strong mountain pose.
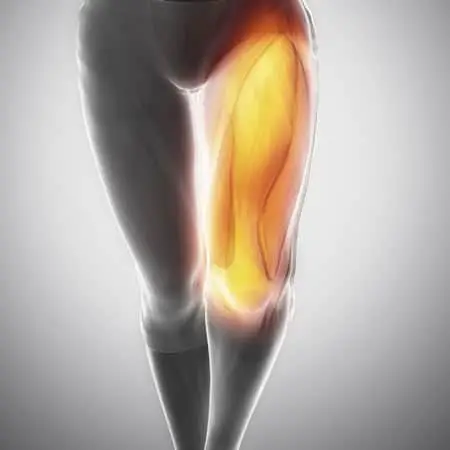
The first thing you want to do here is to activate your quads simply by squeezing them. This is not an exhaustive squeeze, but rather activation of the muscles in order to strengthen your stance. When you squeeze, you will notice that the knee caps lift up slightly.
Not only do you want to squeeze the quads and activate those muscles, but you also want to imagine rotating them inward just a little bit. If you think about the inseams of your pants, you want to try to rotate those inseams towards the back wall. Just as with the squeeze of the thighs and calves, this will not be a drastic movement, but rather a slight twist inward.
In class, you might hear the cue “inner spiral”, which is what we are referring to when we say to slightly twist your inseams in and back. During this phase of setting up your mountain pose, be careful not to allow the spiral to become exaggerated. This will cause your knees to turn in towards each other, which will then pull you out of anatomical position because your knees will no longer be facing forward.
Pelvis
After practicing your inner spiral a few times and getting it to feel right, you might notice that your pelvis started to tilt just a bit, causing an arch in your lower back. We want to correct this by activating the lower abdominal muscles. These are the muscles of the pelvic floor, which control the movement of the pelvic bone.
To correct this, take both your hands and place the middle finger of each hand on its corresponding hip bone (right finger on the right hip, left finger on the left hip). Now place the thumbs on the corresponding ribcage. So your hands are essentially making a square on your stomach, with your middle fingers on the bottom two points (the hip bones) and your thumbs on the top two points (the rib cage).
Now you are going to squeeze the muscles in your lower abdomen and try to shorten the distance between your middle fingers and your thumbs. You are essentially tucking your tailbone under, but I don’t want to use that cue because many people can over exaggerate the tuck, which causes issues in other areas. However, you do want to tuck it under just a tad by activating the pelvic floor muscles and making your square shorter.
Abdominals
The abs are one of the most important muscle groups for a strong mountain pose. They are involved in everything that is happening with your back, chest, pelvis, and more. It is important to note that your goal is to activate the muscles of your core and not “suck in your stomach”, as we will discuss in a minute.
To start, imagine pulling your belly button and all of the muscles around it, in and back towards your spine, and also slightly up. For this, it is sometimes helpful to imagine a string that is attached to your belly button and someone is pulling it in and up toward your spine. As you practice this technique, you should start to feel a tightening of the muscles but still be able to breathe.
Another way to think about this is to just brace your core muscles. If pulling in and back and up seems too complicated or feels like you’re sucking in your stomach, think of it as just tightening the muscles of your core. This will provide a strong base of support for your posture.
It’s important to remember that you are activating the muscles and not trying to suck it in. If you simply suck in your stomach, it will affect your ability to breathe deeply and effectively during the pose. It also will not provide the necessary support for the rest of your body to perform this pose correctly.
Ribcage and Sternum
The next piece of the puzzle is lifting your ribcage and sternum. It is very easy when you brace your abdominal muscles to pull your ribcage down towards them, so we want to correct this right away. Allowing the ribcage to pull down towards the belly button can start a chain reaction of other movements such as the shoulders rolling forward, followed by the upper and middle back, etc…
Keeping your abdominals braced, take a deep breath in and hold it for a second before slowly releasing it. Notice that when you breathe in, your ribcage and sternum lift up and away from your belly button. This is exactly the movement that you’re looking for. You want them to lift up away from your abs, but only to a point.
When you’re just getting started with your yoga practice, you may have a tendency to over-exaggerate many of the movements and adjustments to your various poses. In this case, if you lift your ribcage too much, it can cause a curve in your middle and lower back, as well as a protrusion of your ribcage forward, neither of which is the correct form for mountain pose. Instead, make your movement subtle to get into the correct form and then adjust from there.
Chest and Shoulders
As you lift your sternum and ribcage up and out of your belly, you will notice that your chest lifts, as well. You may also notice that your shoulders come up towards your ears, causing a little bit of tension. Your goal is to open your chest, drop your shoulders, and relax that tension away, so let’s talk about how to do that.
Lift your shoulders up towards your ears like you’re shrugging them. Now pull them back towards the back wall. Now slide them down your back into a strong but comfortable position.
You will notice that when you do this, it naturally opens up your chest. In many studios, you will hear the cues “open your heart,” “lift the sternum,” and “collar bones open.” The exercise we just went through to lift your shoulders up, back, and down will help you to perform this movement correctly.
Arms
Your arms will fall to the sides of your body with the palms facing either forward or inward. Some studios will cue that it’s perfectly fine for your hands to do whatever is comfortable in terms of palm positioning, while others will specify one or the other. The important thing to remember when you’re first starting out is to point your fingers down toward the ground. They should be actively reaching to touch the ground.
To get your arms into the correct position, start with them by your sides, elbows touching the ribcage. Bend your elbows to 90 degrees and face your palms towards the ceiling, like you’re holding a sheet cake in your hands. Now gently relax your arms and let them fall down by your sides.
You may find that your palms naturally gravitate towards the inward position or halfway between inwards and forward. This is completely fine, as long as you are extending your fingers towards the Earth. If you’re in a studio, listen to the cues of the instructor, and they will tell you what to do.
Neck and Head
In today’s tech-savvy world, the position of our neck is increasingly important. The majority of people spend most of their time with their heads down, looking at the phones, or protruding forward, looking at a computer monitor or TV screen. When practicing mountain pose, you want to address all of these things.
You want to start by focusing on a neutral chin position. If you’ve ever heard about the good ol’ days of posture training where they put a book on your head and you have to keep it from falling off, that’s exactly what we’re going for here! So your chin should not be lifted or dropped, but rather just neutral or basically parallel to the floor. Remember that everyone’s body is a little different, so your chin may not be perfectly parallel to the floor, but rather just neutral and relaxed (but not tilted forward or down).
After getting your chin in a nice, neutral position, you want to think about lifting the crown of your head up towards the sky. This will help to lengthen your neck up and out of your shoulders, which contributes to great posture and also opens up the airway a little bit more. Try to really bring awareness to your neck and chin because it has a huge impact on not only your posture but also on any back or neck pain that you might be experiencing.
Last but not least, pull your chin back just a tiny bit to bring the ears back directly over the shoulders. As mentioned earlier, we tend to tilt our heads forward and down on a regular basis, so we need to draw it up and slightly back to correct it. All of these movements combined will give you a really excellent position to now begin your practice!
Short Review of How to Do Standing Mountain Pose
Now that we’ve walked through each step in great detail, let’s review the steps with fewer words so you can practice. We recommend that you physically perform each movement as we walk through these steps so you can really feel what we are talking about. Grab your mat, and let’s go!
- Stand with feet hip-distance apart and parallel to the outside edges of your mat
- Lift the toes up off the mat and place them down again. Repeat this a few times to activate those muscles in your feet.
- Sway slightly forward and back on your feet, allowing the majority of the weight to transfer back and forth between your toes and your heels.
- Lift your inner ankles in and up to become aware of the arches in your feet.
- Engage your calf muscles by squeezing them in towards the midline just slightly
- Take a soft bend in the knees and relax the backs of the knees.
- Activate your quads and feel your knee caps lift up as a result.
- Slightly rotate your quads to in and back.
- Activate your lower abdominals and slightly tuck your tail bone to elongate your spine towards the floor and decrease the arch in your low back.
- Brace your core and lift your sternum up out of your ribcage.
- Lift your shoulders up, back, and down to open your chest.
- Allow your arms to fall down by your sides and extend your fingertips towards the floor.
- Bring your chin to a neutral position, parallel with the floor and draw it back to bring your ears over your shoulders.
- Breathe in deeply and feel all of your muscles gently working to hold this position, but also finding release in the process.
What Does Standing Mountain Pose Stretch?
As you practice your mountain pose, you might start to feel some stretches in different areas that are extremely tight. For example, when you perform your slight pelvic tilt to press the tailbone down and relieve the arch in your low back, you will probably feel a stretch in that low back. Many people experience tightness and pain in that area as a result of a sedentary job or lifestyle.
You may also feel some stretch across the collarbones and chest area. Again, with so many people working at a computer all day long, your chest muscles can become tight, and your shoulders can start to roll forward and down. Since mountain pose requires the exact opposite of this position, you will likely feel a stretch in those areas, as well.
If you are actively stretching your tailbone and fingers down towards the floor while also reaching the crown of your head towards the sky, you will experience a nice stretch up and down your spine. This lengthening in a signal that you are headed in the right direction with your yoga practice. Keep up the great work!
Why is Mountain Pose Important?
Standing mountain pose is important for a variety of reasons. Here are just a few:
Foundation
As mentioned at the beginning of this article, mountain pose is the foundational pose for all other standing poses in yoga. It is the first in a series of poses called the Sun Salutations, which are performed in succession, one after the other. This is referred to as a “flow” sequence in the Vinyasa style of yoga.
Posture and Balance
Standing mountain pose is extremely effective in improving posture and balance. Since every subtle movement, squeeze, and contraction focuses on bringing your body into alignment and neutral positioning, you will feel your posture start to improve drastically. As you become more comfortable in your practice of mountain pose, you may consider bringing your feet a little closer together, which will further enhance your effort to improve your balance.
Flexibility in Your Lower Extremities
Your feet, ankles, calves, and thighs will gain a lot of flexibility from the regular practice of mountain pose. Because of the focus on activating those different muscles, you can really see some great improvement. Flexibility in these areas is a valuable thing to have whether you’re an athlete, a middle-aged person, recovering from an injury, and so on.
Correct Imbalances or Bad Habits
Practicing mountain pose can address a variety of imbalances or issues you might struggle with on a daily basis. For example, if you tend to pronate or supinate on your feet (roll in towards the inner arches, or out towards the outside ones), the foot positioning and swaying forward and back will help you to become aware of that. If you tend to either arch your low back or slump your upper back and shoulders, mountain pose will also help you address and correct those issues.
Improved Balance in Your Nervous System
We discussed mainly the physical parts of mountain pose in this article, but there is a spiritual element, as well. Once you have mastered the physical pose and begin practicing it regularly, you can add breathing techniques and mindfulness training, which will help to alleviate stress and relax your mind. Mountain pose, along with all other yoga poses, is focused on not only the health and strength of your body but also of your mind and spirit.
Conclusion
Standing mountain pose is the most important pose to start practicing if you are interested in the sun salutations, other standing poses, or just a general sense of balance and unity with your body. Hopefully, this article has helped you to identify some ways in which mountain pose can help you to correct certain issues with which you might be struggling. Overall, it is the perfect way to really connect with your body and understand how it all flows together.