Chronic lower back pain is a common experience for many people. Regardless of age or gender, most people experience some type of back pain in their lifetime. Having chronic back pain leads to limited mobility and the inability to work. Back pain is one of the main reasons why people miss workdays.
Introducing a yoga practice can help manage lower back pain. The idea is to foster mobility for a fully functional back. The following yoga postures are intended to provide you with additional resources for tension release and strength:
Low Cobra Pose (Bhujangasana)
Active Child’s Pose (Balasana)
Standing Forward Fold (Uttanasana)
Cat (Marjaryasana) and Cow (Bitilasana) Flow
Downward Facing Dog (Adho Mukha Svanasana)
Locust Pose (Salabhasana)
Building strength in the lower back is essential to help reduce the risk of any further injury to this sensitive region of the body. But before we dive into each yoga posture separately and discuss how to perform it safely, let’s take a look at what can cause lower back pain.
What Causes Lower Back Pain?
Many things can lead to or cause back pain. Injuries like a fall or sports mishap may result in pulled muscles, strained joints, ruptured spinal disks, damaged ligaments, and more. These are the structural problems that lead to a lack of functionality in your back. Other conditions like arthritis, organ diseases, or other infections can cause inflammation in the body’s back region, causing pain and reduced movement.
Everyday actions can create lower back pain, too. If you’re generally inactive, the back muscles can weaken or even become stiff. When the back muscles lack strength, they lose some of the stabilizing components supporting your spine. This creates compression in the spinal column, possibly producing pain.
A stiff back may be a result of limited mobility. If you have a job where you sit most of the day or are driving, this body position does not allow for any agility in the spine, particularly in the lower back.
How to relieve lower back pain?
To relieve lower back pain might require engaging in some minimal yoga postures to strengthen and stretch the lower back muscles. Having a variety of strategies and techniques to relieve lower back pain is essential for continued health.
The following six yoga postures can be safely done at home, on your yoga mat, at your own pace. Let’s go through them one by one with comprehensive instructions.
Low Cobra Pose (Bhujangasana)
Some yoga postures that help to strengthen the muscles that support the spine are backbends. One particular pose, called Low Cobra Pose, is designed to strengthen the erector muscles of the low back region.
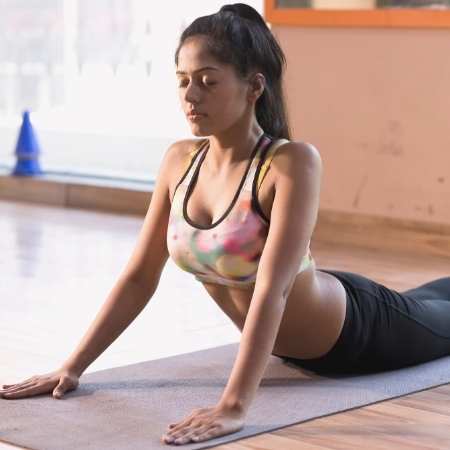
- Start the posture by lying on your stomach on your yoga mat.
- Place your hands underneath your shoulders. Your legs will extend straight behind you.
- Grip the mat with your fingertips and gently pull yourself forward (bring your head up). This is a very minimal movement.
- At the same time, point your toes and feel them reach toward the back of the room. By doing this, you are creating length and space along your spinal column as you prepare for the low backbend.
- As you continue to tug lightly with your fingers, inhale to create more length in the body. Exhale and engage your core muscles by lifting your belly button up toward your spine. This action stabilizes the body to minimize compression in the spine.
- Inhale again to maintain the length, exhale to engage your abdominal muscles, and gently lift your upper body away from the ground. You do not need to lift very high. You should feel the low back muscles flex.
Hold this low backbend position for 3-5 breaths if you are able. Fully relax your body by lying on your belly: bring your head down, relax your hands. Repeat Low Cobra Pose two more times.
Cobra pose can be replaced with Sphinx pose (Salamba Bhujangasana) in case you feel pressure on your wrists and too much pain in your back.
Active Child’s Pose (Balasana)
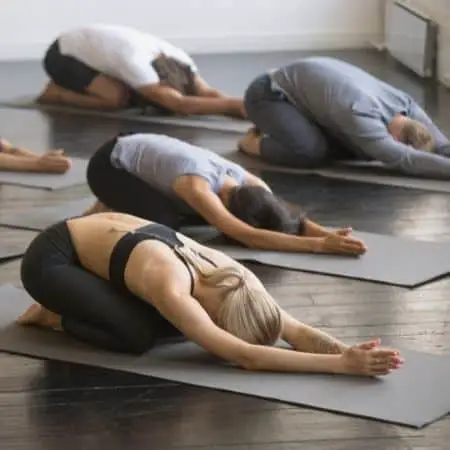
In addition to strengthening the low back, this body region also needs to be stretched. This will release any tension that builds up so that you can regain functional movement.
Active Child’s Pose adds an element of lengthening in the spine as it releases tightness in the low back.
- Come to your hands and knees on your yoga mat.
- Sit back onto your haunches and extend your arms out in front of you.
- Activate the body by reaching forward.
- You can hold this position for as long as you’d like.
You can add a slight side bend by reaching toward one side of the mat then the other. This will lengthen the sides of your body while you’re in this pose.
Standing Forward Fold (Uttanasana)
If you need more of a stretch through your entire back body, try Standing Forward Fold.
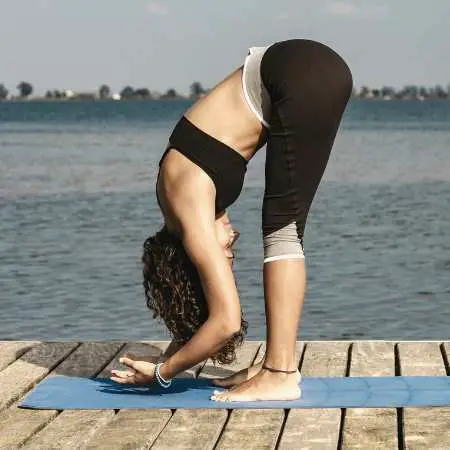
- Come to a standing position.
- Inhale to reach your arms overhead.
- As you exhale, carefully fold forward until you are able to touch your toes (or ankles, calves in case of limited flexibility).
- Hold this folded position to create the sensation of hanging forward. This will release tension in your back but particularly in your lower back.
Allow your arms to dangle down toward the floor and loosen your neck to ease tension in the upper region of your spine. Holding onto opposite elbows creates a heaviness in the upper body, resulting in more of a low backstretch.
This is another posture that you can hold for a more extended period of time and repeat to gain the benefits of the yoga asana.
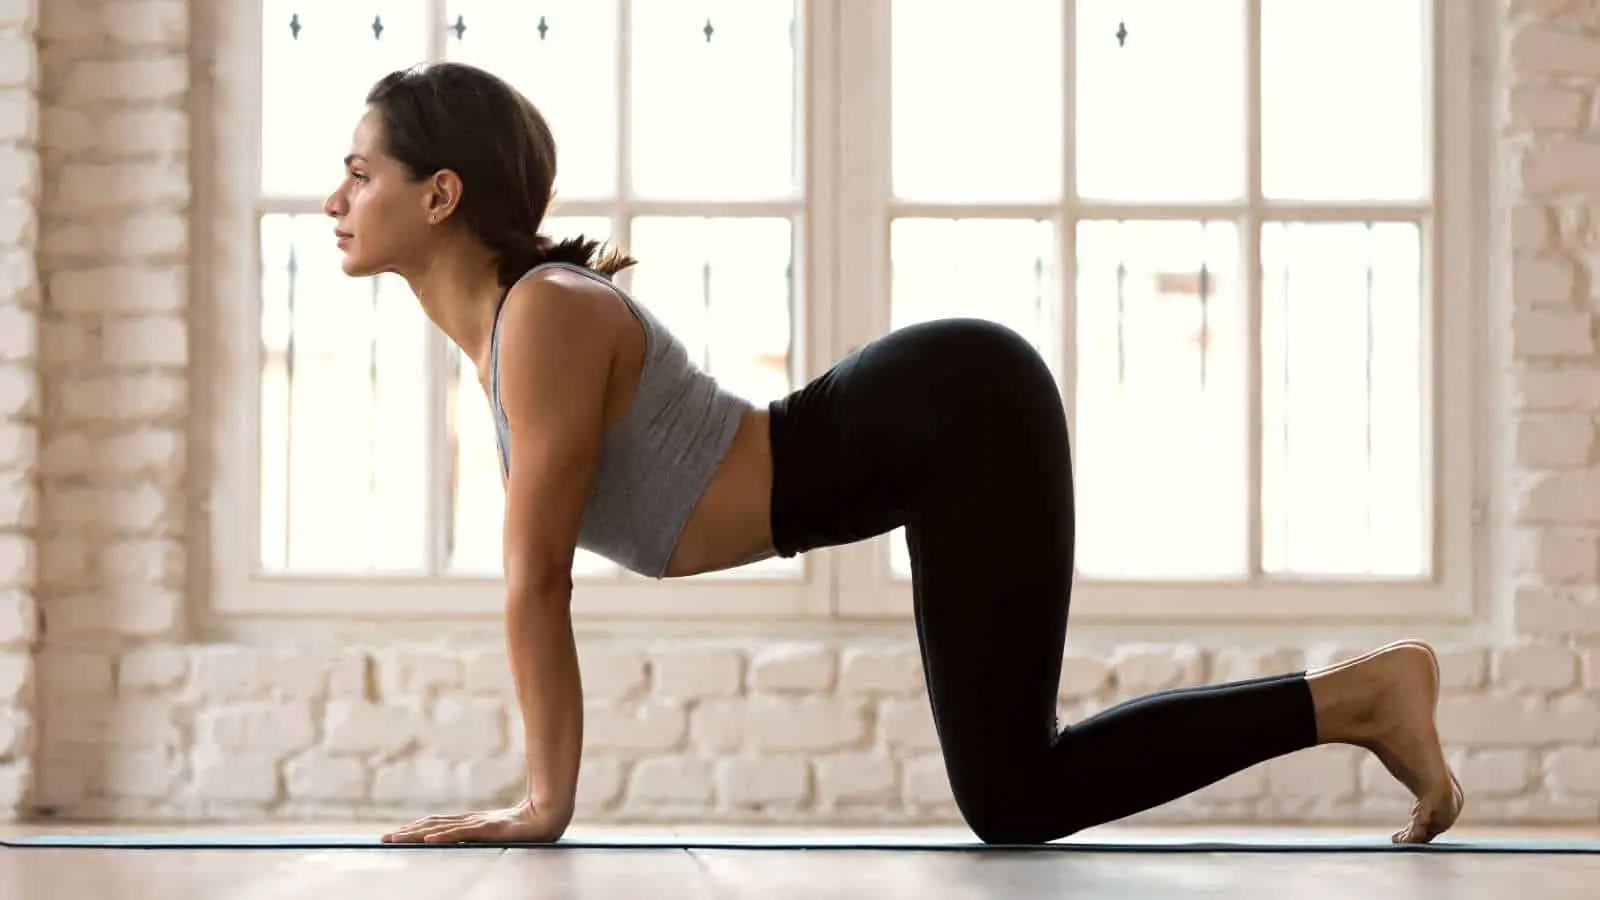
Cat (Marjaryasana) & Cow (Bitilasana) Flow
These are two yoga poses in this flow: Cat Pose and Cow Pose. They are commonly done together in a fluid motion to relieve back pain.
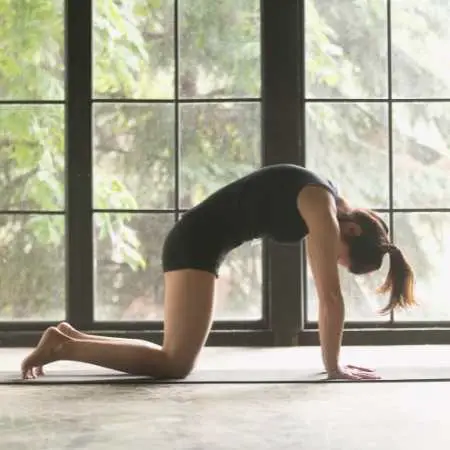
- Start the sequence on your hands and knees, known as a tabletop pose (Bharmanasana).
- Be sure to align your hips over your knees and your shoulders over your wrists.
- Inhale, lift your head and open your chest. Your back will arch, creating a mild backbend. Allow your belly to drop and your pelvis to tip back. This is Cow Pose.
- When you exhale, tuck your chin toward your chest, round your back, draw your navel toward your spine, and tilt your pelvis forward. This is Cat Pose.
- Continue through these two movements guided by the rhythm and flow of your breath.
- To finish your Cat & Cow Flow, you can sit back onto your haunches and slowly slide into Child’s Pose as a way to relax the body after your fluid motion.
As you breathe and move, you create a gentle undulation of the spine that opens your entire back. With the rocking motion of your pelvis, Cat and Cow flow releases tension in your low back area. You will also notice that the flow opens your chest and shoulders because of the motion of your torso.
You are also welcome to hold these postures as static positions. For example, inhale into Cow Pose. Hold the backbend posture while still breathing in and out. Pay attention to the muscle contraction in your back. This encourages strength throughout the back muscles that support your spine.
You can do the same with Cat Pose. Hold this posture to create that rounded feeling in your back. It stretches the muscles along the spine, particularly in the lower back. In addition to that, it strengthens your core when you contract your abdominal muscles. This, too, encourages supportive strength in your body.
Downward Facing Dog (Adho Mukha Svanasana)
Downward Facing Dog is a common posture that is often performed while moving through Sun Salutations. In its own right, though, it can bring relief to your lower back.
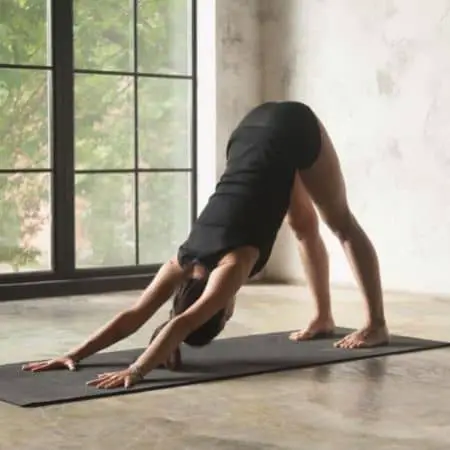
- Begin on your hands and knees – a tabletop pose (Bharmanasana).
- Tuck your toes, then lift your hips into the air until you’ve formed the inverted V-shape of Downward Facing Dog.
- Press your palms firmly into your yoga mat to add strength and stability to your upper body. This will also cause your spine to elongate more in this position.
- Place a slight bend in your knees; this keeps your hips mobile and further lengthens your back.
Because the lower back tends to compress from sitting and standing positions, this inverted pose for the body allows for length and relief in the lower back. You can simply hold the posture for ten slow breaths or add some gentle movements side to side to encourage more relief. Rest in Child’s Pose when you are complete.
Locust Pose (Salabhasana)
This is a backbend yoga posture that fosters lower back strength. It is an excellent position to do after you have performed movements that encourage tension release.
- Begin this posture lying on your stomach with your hands underneath your shoulders. As you proceed, it is important to build proper structure and alignment in this yoga backbend, so you do not contribute to further strain on your lower back.
- Be sure to extend your legs out behind you; point your toes to help engage your leg muscles.
- Grip the mat with your fingertips, roll your shoulders away from the floor to engage your upper back muscles.
- Inhale to create length throughout your entire body. Feel as if you’re trying to drag yourself forward with your hands while at the same time reaching your toes to the back of the room.
- As you exhale, draw your navel up toward your spine to create support in your core body. Your stomach will not lift away from the mat; it is just a way to activate your body. You will also feel your glute muscles flex for added support.
- Once you have elongated your body and provided core support, gently lift your legs and chest off the floor. You will not need to rise very high; you should feel your low back muscles flex.
- Inhale to create more length in your body, followed by an exhale to generate support. As you’re able, lift a little higher.
- Continue to be aware of the sensation in your lower back. The idea is to strengthen these erector muscles with flexion, not strain them by pinching this sensitive region.
- Your hands can remain on the floor underneath your shoulders for additional support. If you’re able, though, lift your hands and extend them back behind you as if you’re reaching for your feet.
- Hold here, or interlace your fingers behind you to feel the full expression of Locust Pose.
- Hold and breathe in this yoga position for five to ten slow breaths. When complete, slowly slide into Child’s Pose.
These six yoga positions can be added to the original set of yoga postures already featured or practiced on their own. It is recommended that you practice these yoga positions 3-5 times per week for effective and noticeable results. Take note of how you feel in the coming days.
Conclusion
If you experience lower back pain related to an injury, health condition, or immobility, try these simple yoga postures to generate strength in your back muscles and release tension for added mobility and functionality. Soon you will be standing tall with good posture, move with ability, and experience a pain-free livelihood.