One of the basic principles of proper meditation techniques is that the mind must be clear. To accomplish this, the practitioner must be in a comfortable position. Otherwise, meditating for extended periods causes physical distractions to set in as thoughts quickly turn to increasing knee pain, growing numbness in the lower extremities, or rapidly intensifying prickly sensations in the feet.
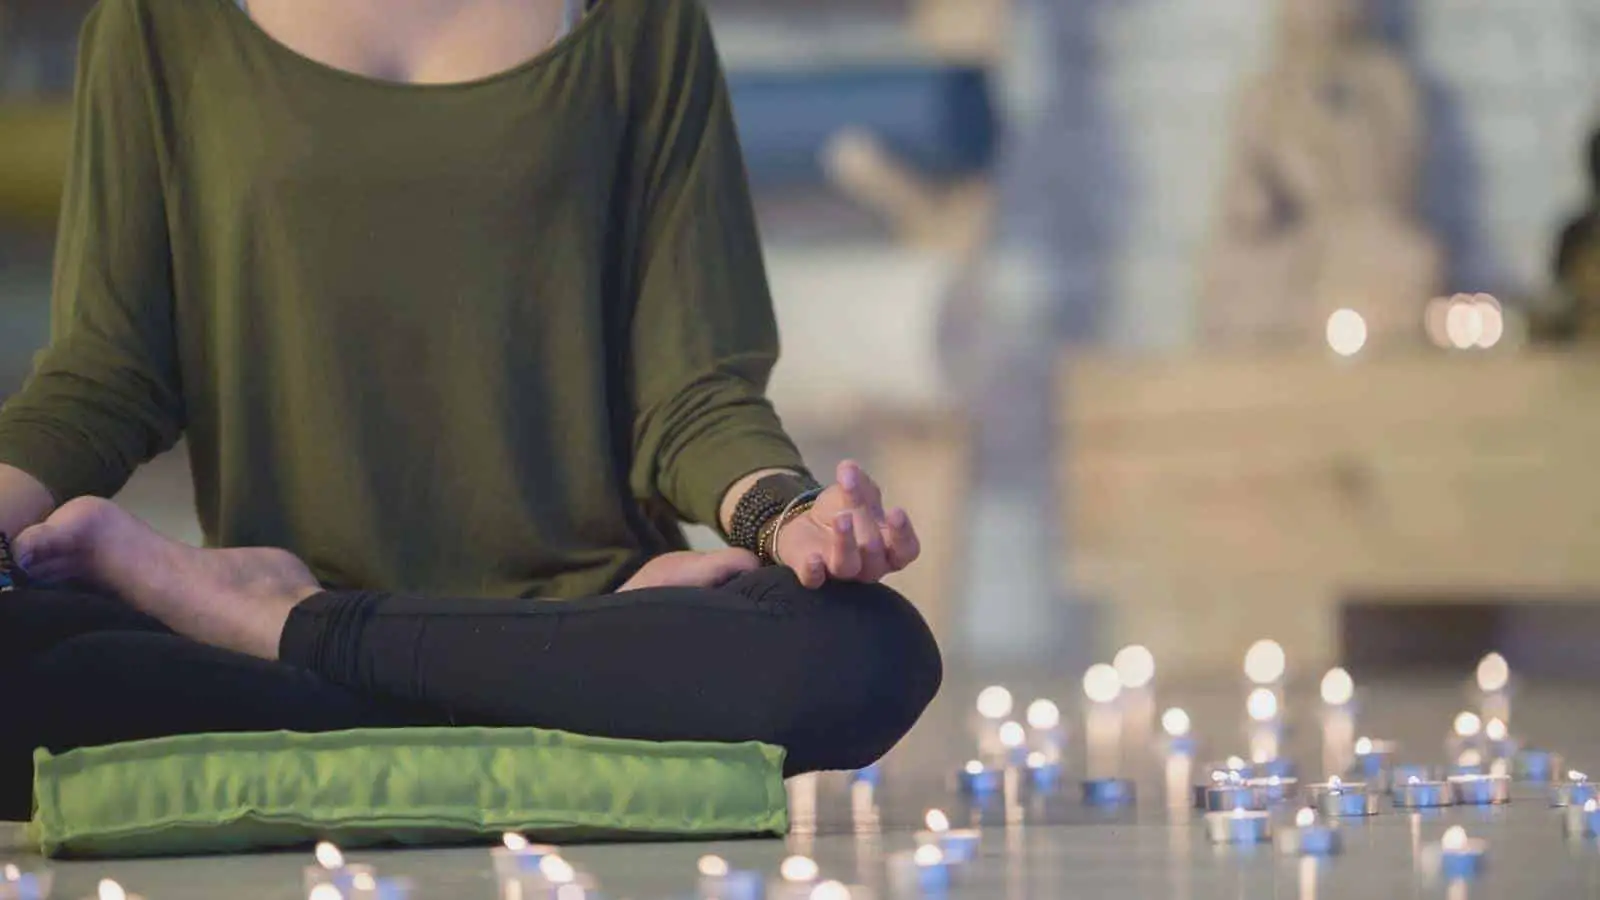
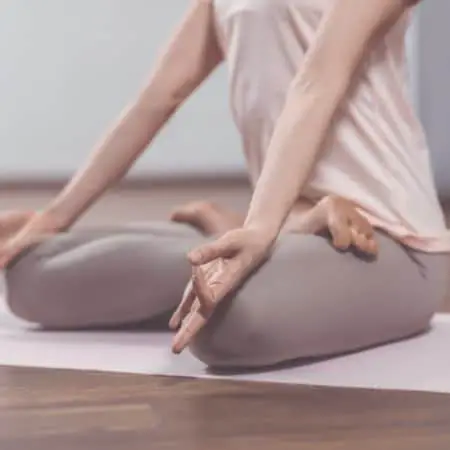
A meditation pillow is so much more than a fashionable cushion to sit on while you meditate. For many people, a meditation pillow is a vital piece of equipment, without which meaningful meditation sessions would not be possible. However, a meditation pillow must be used properly for it to perform its intended purpose.
You can sit on a meditation pillow in different seated positions. The key thing to remember about meditation pillows is that they are designed to serve two primary functions: to ensure proper vertical alignment of your head, neck, spine, and hips and to elevate your hips above your legs.
So, how to sit on a meditation pillow? Continue reading to learn about seven different seating positions that will allow you to use your meditation pillow to its fullest potential.
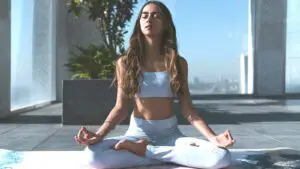
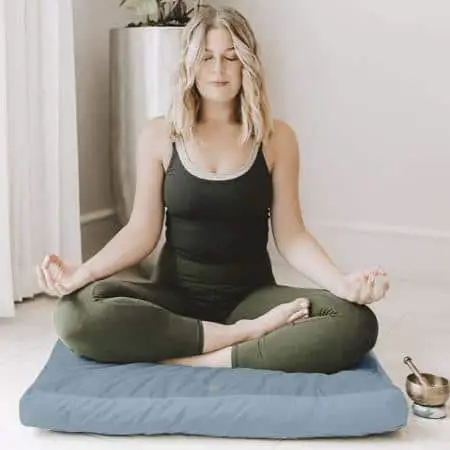
The Lotus (Padmasana) position
The lotus position may be the most iconic of all meditation positions and as close to perfect symmetry as the human body can achieve. Unfortunately, it may very well be the most challenging position to execute correctly and sustain for prolonged periods of time. Luckily, there are several versions of padmasana, with each being less difficult and strenuous than the full lotus to practice and master.
The two alternate versions of the full lotus position are the half-lotus and the quarter-lotus positions. A simple way to think of these positions is as a progression from easiest to most difficult, with the quarter-lotus position being the meditative pose for beginners, the half-lotus being for advanced practitioners, and the full lotus being for experts.
The Full Lotus Position
This classic meditation pose evokes images of long-bearded yogis effortlessly twisting themselves into pretzel-like shapes. The reality is that a properly executed full lotus position is difficult to achieve, let alone maintain for long meditation sessions. Think of the full lotus as the ultimate form of sitting cross-legged.
The defining elements of a full lotus sitting position are fully-crossed legs with each foot resting on the opposite leg’s inner thigh. Using a meditation pillow with this position helps to vertically align the hips, spine, neck, and head while elevating the hips and pitching the pelvis forward, thus allowing the knees to rest comfortably on the floor.
Here is how to execute the full lotus position with a meditation pillow (or meditation mat):
- Place your meditation pillow on the floor in the area that you have designated as your personal meditation space.
- Sit comfortably on the forward part of the pillow (as opposed to the center or back of it) with your knees bent as if to sit cross-legged.
- Bring your left foot toward you and set it on top of your right inner thigh.
- Bring your right foot toward you and set it on top of your left inner thigh.
- In this orientation, your right foot is above your left foot.
- There are three primary points of contact for the full lotus position: your buttocks on the meditation pillow and each of your knees on the floor.
- It may be a good idea to switch feet periodically (either midway through your meditation session or on alternating days) so that each spends an equal amount of time above the other.
The full lotus position is an advanced meditation pose. Many practitioners need to gradually work their way up to this position, while others who are naturally limber and flexible can adapt to it more quickly. Some people should not attempt to meditate in the full lotus position because of physical impairments.
For this pose, the best would be to use meditation mats. There are many available in different sizes, colors and produced from different materials.
The Half-Lotus Position
The half-lotus position is the intermediate version of the full lotus. It is a good way for meditation practitioners to acclimate themselves to having one foot resting on the inner thigh of the opposite leg. By alternating the foot that is propped up, enough flexibility can be gained to enable the full lotus position to be assumed.
Here is how to execute the half-lotus position with a meditation pillow:
- Initiate the half-lotus position by sitting on the forward portion of your meditation pillow with your knees bent as if to sit cross-legged.
- Bring one foot in and place it on the inner thigh of the opposite leg.
- The other foot will be nestled underneath the raised leg and resting on the floor.
- Alternate the foot that is in the raised (propped) position either midway through your meditation session or on alternating days so that you build up flexibility and develop muscle memory as you work your way to assuming the full lotus position.
The Quarter-Lotus Position
The easiest of the lotus position trio is the quarter-lotus, which requires only one foot rest on the opposite leg’s calf, while the other foot rests on the floor. Even for those who are not very flexible or have a limited range of motion in their knee and hip joints, this is a relatively comfortable position to get into for meditation. Both feet resting on the floor while crossing your legs is also a version of the quarter-lotus. For this pose, just like for the full lotus pose, meditation mat would be the most recommended.
Here is how to execute the quarter-lotus position with a meditation pillow:
- Initiate the quarter-lotus position by sitting on the forward position of your meditation pillow with your knees bent as if to sit cross-legged.
- Bring one foot in and place it on the calf of the opposite leg.
- The other foot will be nestled underneath the raised leg and resting on the floor.
- Alternate the foot that is in the raised (propped) position either midway through your meditation session or on alternating days so that you build up flexibility and develop muscle memory as you work your way to assuming the half-lotus position.
A Few Tips About the Lotus Meditation Poses
For all of the lotus poses, you may find it easier to get into proper position (especially propping your foot up on your calf or thigh) by spreading your knees out wider (away from each other) and opening up your hips more.
Remember to sit on the forward portion of your meditation pillow, as this should make bending your knees and crossing your legs easier. You may need to experiment with how far forward you need to sit to create the proper downward pelvic angle to enable you to position your knees and cross your legs properly.
Do not force your legs into position, especially your knees, as serious injury can result. This is particularly true for the full lotus position, as there may be a temptation to wrestle your feet into position on your inner thighs, which can twist and contort your knee joints in dangerous ways.
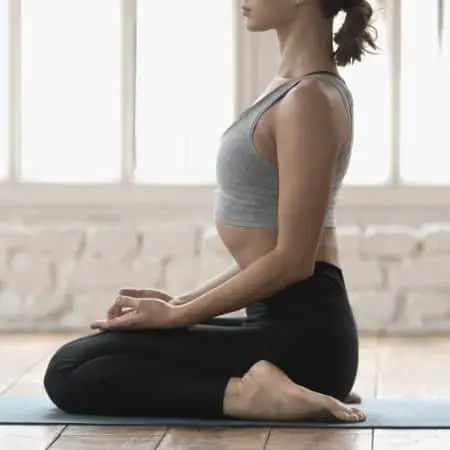
The easy pose (Sukhasana)
A meditation position very similar to a quarter-lotus pose with about the same level of difficulty is the easy pose. At first glance, the two positions appear identical. The primary difference is the position of the raised foot and the exposure of the toes. The name of this pose can be attributed to the fact that there is less strain on the knee and ankle joints compared to the quarter lotus.
In the quarter-lotus position, the raised foot is fully exposed and resting on the opposite leg’s calf with toes pointing directly to that same leg’s knee. In contrast, in the sukhasana pose, that same foot would be tucked behind the calf of the opposite leg, with the toes obscured from view and pointing down toward the floor.
For this position, the meditation pillow serves as a sitting platform that elevates the hips above the legs and angles the pelvic bones downward to make bending and crossing the legs easier and more comfortable (a 30-degree angle is considered ideal for the easy pose).
Here is how to execute the easy pose with a meditation pillow:
- Sit on the forward portion of the meditation pillow so that you are sitting comfortably and you are leaning slightly forward.
- The downward angle created by the meditation pillow ensures that the knees or lower legs are resting on the floor, and these additional points of contact provide stability during meditation.
- Bend your knees and bring in your legs to cross them.
- One foot will be raised above the other, coming in over and behind the opposite leg’s calf, with the toes tucked between the calf and the inner thigh and pointing toward the floor.
- The other foot will be resting on the floor (underneath the over-crossing leg).
- Remember to alternate the position of your feet periodically.
For people with limited flexibility in their legs/knees, the best would be to use a meditation cushion / meditation pillow which lifts the hips from the ground, while providing enough space for the legs to be crossed. One of the examples could be Mindful and Modern Meditation Cushion.
The Burmese position
The Burmese position is the easiest of all the sitting, cross-legged meditation positions. Unlike the three lotus variants and the easy pose, neither foot is propped up on any part of either leg. Instead, both feet rest on the floor, and as a result, any bending and twisting of the knee joints are minimized.
Even though this pose is less physically demanding on the practitioner, using a meditation pillow is still advisable to achieve a properly aligned back. Additionally, both knees need to rest completely on the floor if possible, and sitting on the forward edge of the pillow allows for this.
Here is how to execute the Burmese position with a meditation pillow:
- Sit on the forward third or quarter of the meditation pillow to angle your hips slightly downward.
- Bend your knees as if to sit cross-legged and bring one foot in toward you – this foot will remain on the floor as close to your body as you can manage.
- Bring your other foot in toward you and position it directly in front of the other.
- Your feet should now be on the floor, one behind the other, with the toes of each foot pointing in nearly opposite directions.
- Ideally, the sides of your bent knees should be resting on the floor, and this is where sitting properly on the meditation pillow with your hips angled forward and downward should help you (generally speaking, the greater the height of your pillow, the more contact you should achieve between your legs and the floor).
- Even though both feet are resting on the floor with this pose, it is still a good idea to alternate feet positions so that each one spends an equal amount of time positioned in front of the other (there are still slight differences in the degree of knee bend corresponding to which foot is in front).
If ever there was a perfect meditation pose for beginners, this would be the one. With the right meditation pillow and proper sitting techniques, you can start your meditation journey on the right foot.
The Hero pose (Virasana)
Sitting in cross-legged type poses is not the only effective way to meditate; various forms of kneeling are also very popular among practitioners, and the hero pose is one that is on everybody’s meditation radar. Known in Sanskrit as the virasana position, this meditation pose is ideal for people who find sitting cross-legged on the floor very difficult to do, very painful to sustain, or just physically impossible.
The hero pose is a sitting position, but instead of meditating with your legs crossed in front of you, each knee is resting on the floor, pointing forward, and bent so that each foot is to either side of you and pointing back. The basic concept of the virasana position is that you are seated on the floor in the space between your feet.
For many practitioners, especially those who are new to the meditative arts, stiff quadriceps muscles or uncooperative knee joints can make sitting on the floor difficult. A meditation pillow is a perfect prop to make this pose easier.
Here is how to execute the hero pose with a meditation pillow:
- Begin by kneeling on the floor with your knees close together.
- Spread your feet approximately 45 cm / 18 inches apart, and position your meditation pillow between them.
- Lower your bottom toward the pillow until you are seated (you may need to experiment a bit to find out which part of the pillow provides you with the best support).
- The tops of your feet should be lying flat on the floor, and your toes are pointing straight back behind you.
- By sitting on the meditation pillow, you should be able to easily maintain proper vertical posture while allowing the majority of your body weight to rest on the pillow and not on your knees and feet.
- If you feel a lot of strain or pain in your thigh muscles or your knees, you may benefit from a thicker meditation pillow. You can also add a folded blanket or two to supplement your pillow.
Although this is considered a basic meditation pose, it should still be approached with an appropriate amount of mindfulness as far as injury prevention is concerned. Slow and deliberate movements are advised, and you will need to be able to immediately recognize when your body is telling you that it cannot go any further.
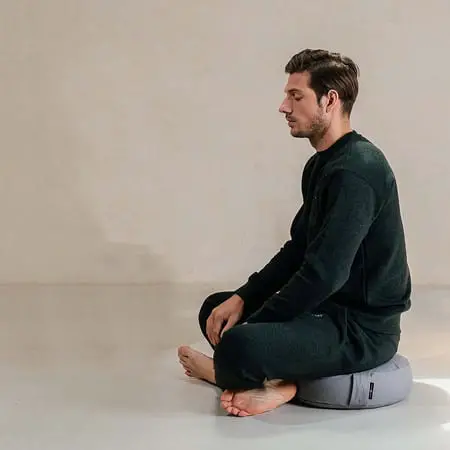
The Thunderbolt pose (Vajrasana)
The thunderbolt pose is another kneeling pose and is often mistaken for the hero pose (and vice-versa). Even though the visual differences between the two poses may be subtle, the differences are quite significant from a functional perspective. It begins with where and how the practitioner is seated.
In the hero pose, the knees are close together while the feet are spread shoulder-width apart, and the practitioner is seated on the floor in the space between the feet. In the thunderbolt pose, the feet are closer together (in-line with the knees), and the practitioner sits on the upturned heels of both feet. The vajrasana is a more compact pose and is widely considered the more difficult position of the two kneeling poses.
Here is how to execute the thunderbolt pose with a meditation pillow:
- Begin by kneeling with your knees close together (touching if you can manage it).
- Your ankles should be close together as well (ideally, your big toes should be touching each other). The soles of your feet should be facing up as the tops of your feet are resting flat on the floor.
- Slowly lower your bottom toward the heels of your feet, which is where you will be seated.
- As you reach the sitting position, the back of your thighs (the hamstrings) will close in on the back of your calves, and they will be clamped together during this pose.
- You may need to adjust your buttocks on your heels (side to side, front to back) to get comfortable and to properly align your head, neck, spine, and hips.
- The final positioning for meditation is gazing straight ahead with your jawline parallel to the floor and your hands resting on the top of your thighs with palms facing down.
A meditation pillow can be utilized in several ways to make this pose easier to get into and to maintain for longer periods:
- If sitting on your heels causes too much strain on your quadriceps or knees, then placing a meditation pillow on your calves and sitting down on the pillow instead of your heels may provide much-needed relief.
- Alternatively, setting the meditation pillow on its edge and nestling it between your calves (while keeping your legs together) can provide even more support while seated.
- Placing the meditation pillow on the floor and placing your feet on top can also provide much-needed leverage for some practitioners.
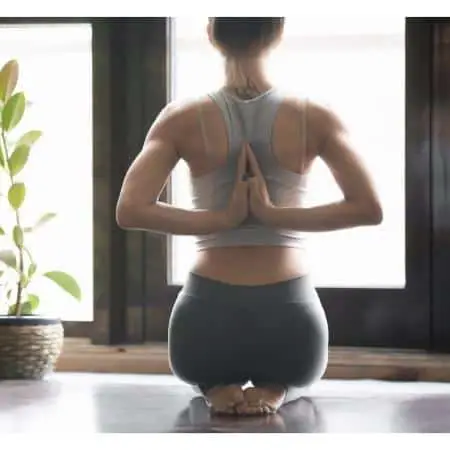
The bound-angle pose (Baddha Konasana)
The bound-angle pose is another iconic pose, both in meditation and yoga circles. This pose also goes by several other names: it is the butterfly pose to many practitioners, the cobbler’s pose to others, and the baddha konasana to hardcore enthusiasts. Despite its seemingly easy physical requirements, this is a challenging pose to master.
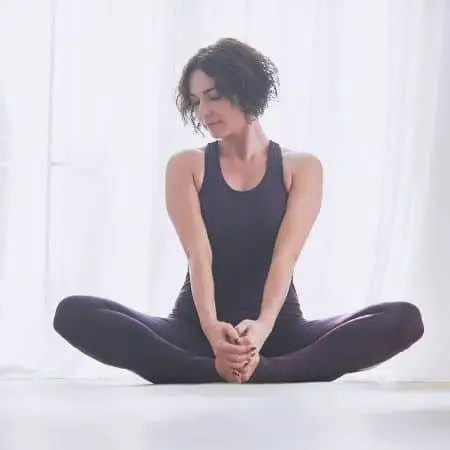
This is a seated pose, and its signature element is the joining of the soles of the feet in front of the practitioner, causing the bent knees to splay out to the sides like wings. The baddha konasana is less stressful on the knee joints but requires opening the hips much more. Also, this meditation pose demands flexibility in the upper leg muscles, particularly those of the inner thighs.
A meditation pillow is vital for the bound-angle pose, especially for beginners. Elevating the hips off the ground assists in opening up the hip joints, which makes putting the soles of the feet together easier. The closer you bring your feet to your body, the more that the inner thigh muscles are stretched, so you can adjust muscle tension by moving your feet toward or away from you.
Here is how to execute the bound-angle pose with a meditation pillow:
- Begin by placing your meditation pillow on the floor and sitting on the forward edge so that your hip and pelvis are angled downward.
- With your feet in front of you, bring them toward you and place the soles against each other.
- Grasping each foot with one hand, slowly bring your now-joined feet in toward you; in doing so, your knees will automatically bend while the back of your thighs (the hamstrings) and the back of your calves close tightly against each other.
- Ideally, the sides of your knees should rest on the floor, but this does require quite a bit of flexibility, particularly in your inner thigh muscles. If you have a couple of extra meditation pillows lying around, you can place them under your knees until your flexibility improves
The bound-angle pose is widely viewed as a precursor or gateway to cross-legged meditation positions. Although it certainly is easier on the knee joints than the full lotus position, the baddha konasana has its challenges, namely getting those pesky inner thigh muscles to cooperate.
Meditating while seated on a chair
Contrary to whatever notions you may have, meditating does not necessarily have to be performed while sitting on the floor or cushion. Meditating while seated on a chair is not only a perfectly acceptable technique, but for many practitioners, it is the only viable means of meditation due to back, hip, or knee conditions or other physical ailments that make sitting or kneeling on the floor exceedingly difficult.
Just like meditation poses like the lotus, Burmese, easy, and other sitting positions, good posture is very important when meditating while seated on a chair. And as with meditative techniques that are done while seated on the floor, chair meditation is greatly aided by using a meditation pillow, either to provide back support or to provide proper hip alignment.

Here is how to meditate on a chair with a meditation pillow:
- Using the right chair height is very important. When seated, your feet should lie flat on the ground, set hip-width apart from each other (if your feet do not reach the ground and there are no other chairs available, use blocks or books to rest your feet on so that they are resting flat).
- The chair you select should enable you to sit up straight (versus reclining back or slouching forward).
- Ideally, your hips should be slightly above your thighs (to encourage proper spine alignment, just as if you were sitting on the floor), and this is where your meditation pillow comes in – either to sit on or to wedge between the chair and your lower back (you may even benefit from the use of two meditation pillows in this instance).
- Be mindful of proper vertical alignment once you are comfortably seated.
Aside from its benefits for those who have limited mobility, meditating in a chair enables all practitioners to take a few moments during the day and meditate without the hassle that can come with meditating on the floor.
The Importance of Maintaining Proper Back Alignment
It is important to realize that, aside from making knee bends and leg crossing easier, a meditation pillow also encourages proper vertical alignment of your hips, spine, neck, and head. This does not mean that your back should be perfectly straight, as this is not the normal structure of your spine. A properly aligned spine is naturally curved in the shape of an “S” when viewed from the side.
There are four curves in a healthy spine (starting from the base/bottom):
- The sacral curve (convex-shaped – curves outward)
- The lumbar curve (concave-shaped – curves inward)
- The thoracic curve (convex)
- The cervical curve (concave)
Using a meditation pillow properly will maintain these natural curves, which are necessary to provide shock absorption for your head, neck, and shoulders. Regardless of the pose you are using, sitting on a meditation pillow with the correct hip angle will allow curves in the spine to rest in their natural positions, with minimal muscle tension.
Final Thoughts
As with many physical activities and endeavors, having the right equipment can be the difference between success and failure. Even though meditation is at its core an exercise for the mind, the body must be trained to strike various meditative poses to allow true mindfulness to take place. Therefore, a meditation pillow is as much about physical comfort as it is about getting yourself into the right mindset.