Knee pain is an ailment that affects millions of people every day. Yoga is a useful treatment option to help reduce pain in the knees and prevent it from recurring. So, what are the yoga poses and props that can help alleviate knee pain?
Yoga positions that can help alleviate knee pain include easy poses like Mountain and Wide-angle. But some are more complex, like the Lotus or Warrior. Props are items that can help with various positions, such as yoga mats, rollers, straps, and blocks.
This article will provide you with a list of yoga poses and props that could help alleviate knee pain. We’ll break down the steps and tell you how each position is useful. We’ll also provide ways to modify the poses to account for your sore knee joints.
How Does Yoga Stop Knee Pain?
Yoga is a form of exercise that requires you to manipulate your body into different positions. Each pose targets a specific area (or areas) of the body. These stretches can help your muscles relax, improve flexibility, and build strength.
You can use yoga to help reduce or eliminate knee pain by using specific poses designed to target the leg’s crucial areas that can affect or cause issues with your knees.
Understanding what causes knee pain can help you determine which yoga poses you should do to stretch the knees, to strengthen them, or poses to ease the pain. It can also help you to use modifications to these techniques that take these factors into account, so you don’t overwork your knees.
What Should You Do Before Doing Yoga Poses?
Before you get into doing your yoga poses, it might help to loosen certain muscles up. Many yoga instructors recommend using a foam roller to work the tension out before you attempt posing.
You may feel some pain and discomfort using a roller, but this is normal. And it’s necessary to get your muscles ready for all the bending and stretching you do. Trying to manipulate tight muscles can result in pain and injury.
When you’re ready to do yoga, spend five to ten minutes using a foam roller before starting your exercises. Target the quadriceps, hamstrings, calves, glutes, and the sides of the thighs, known as IT bands.
Yoga Straps
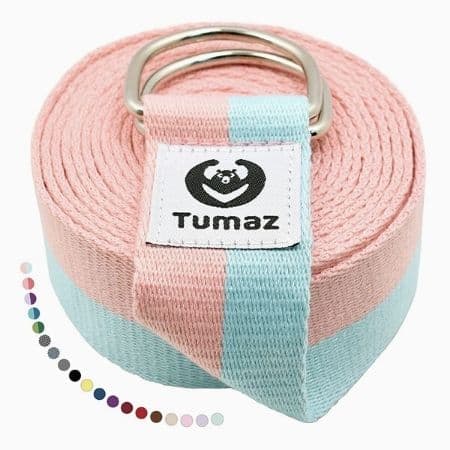
Many poses can be easier for beginners by working with props, such as yoga straps. These are useful to assist with stretches if you’re not flexible or experience too much pain when bending.
Straps come in different lengths and different methods of sizing the straps, such as metal buckles, D rings, cinch buckles, and pinch buckles. Beginners usually do best with a strap that doesn’t have any adjustments.
Knee Pad
If you have problems putting weight on your knees during yoga, you may want to consider investing in a knee pad.
Knee pads provide extra cushion and support for your ailing joints. You can lay these mats on top of your yoga mat to assist with workouts where you need the extra cushion.
They’re small and lightweight enough to take everywhere and roll up for convenient storage.
Yoga Blocks
Yoga blocks are great for people who are new to yoga or who have balance or flexibility issues. There are blocks of different sizes, shapes, weights, and materials. And there are also blocks designed for specific areas of the body. Check out this useful guide on everything you need to know about yoga blocks.
Other common props that you may want to have on hand to help with knee pain include:
If you’re looking for something to help you get your muscles ready for yoga, foam rollers are an excellent tool to buy.
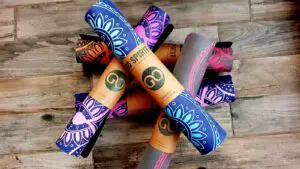
Yoga mats and blankets can help with specific exercises or poses by ensuring you don’t put too much stress on your sore knees.
If you will be doing yoga at home to reduce knee pain, it helps to have tools or props. Most rehab facilities and some yoga studios may have these on hand that you can use during your sessions if you’re not in the position to purchase your own.
Yoga Poses for Stretching the Knees
The following yoga poses are designed to stretch your knees and help alleviate your knee pain:
Wide-Angle Seated Forward Bend
The Wide-Angle Seated Forward Bend, or Upavistha Konasana, is an excellent pose for stretching your knees and the rest of your body.
This move will also work your back, hips, groin, and inner thighs. This is one of the easiest and least painful yoga poses you can do if you have aching knees and would like to stretch.
Technique
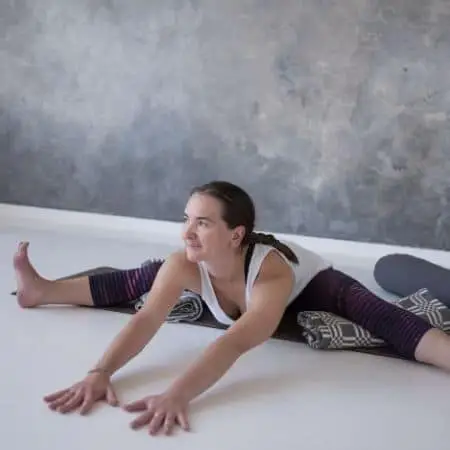
To start this stretch, you need to sit with your legs spread as wide as you can tolerate without pain. Begin by flexing your feet.
Next, put your hands flat in front of you and move them forward until your muscles start to pull. Your spine should stay straight. Hold your position for eight to ten breaths. Then, pull your legs together and bring your knees up towards your chest.
Modifications
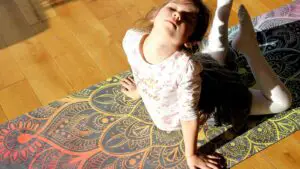
If your back curves into a C shape while you’re bending, put a blanket or towel under your butt, elevating the sit bones. Another modification could be placing two two yoga bolsters of yoga blankets under your knees, as dispayed in the picture. You should feel stretching in the knees, but no pain, which is very important to keep in mind.
These modifications help reduce pressure and make it easier to keep your back straight. Having something soft underneath you also helps make it more comfortable for you to lie down.
Lotus
The Lotus, Sukhasana, is another simple, basic yoga pose that anyone can master. But it’s also a pose that people with knee pain don’t typically enjoy.
This pose is a great way to stretch the knees and ankles. You can also feel some stretching in the back and thighs.
Technique
To do the Lotus pose, you sit on your yoga mat and cross your legs Indian style. You will then proceed to put both of your feet on top of your thighs.
Many people find they cannot thoroughly fold their legs into a full lotus position. The closer your feet are to your hips, the deeper the bend of the knee, which can cause pain.
If folding your feet over your legs isn’t an option, rest your feet in front of each other. Hold your position for eight to ten breaths.
Modifications
Some people place blankets under their hips, so the pose is more comfortable. Or they put yoga blocks on either side of the knee.
Take it slow, and don’t get frustrated if you can’t get the pose the first time. Trying to force your body into a position it’s not prepared for can result in more pain and potential injury. Follow your body’s direction, and don’t push further than your body can handle.
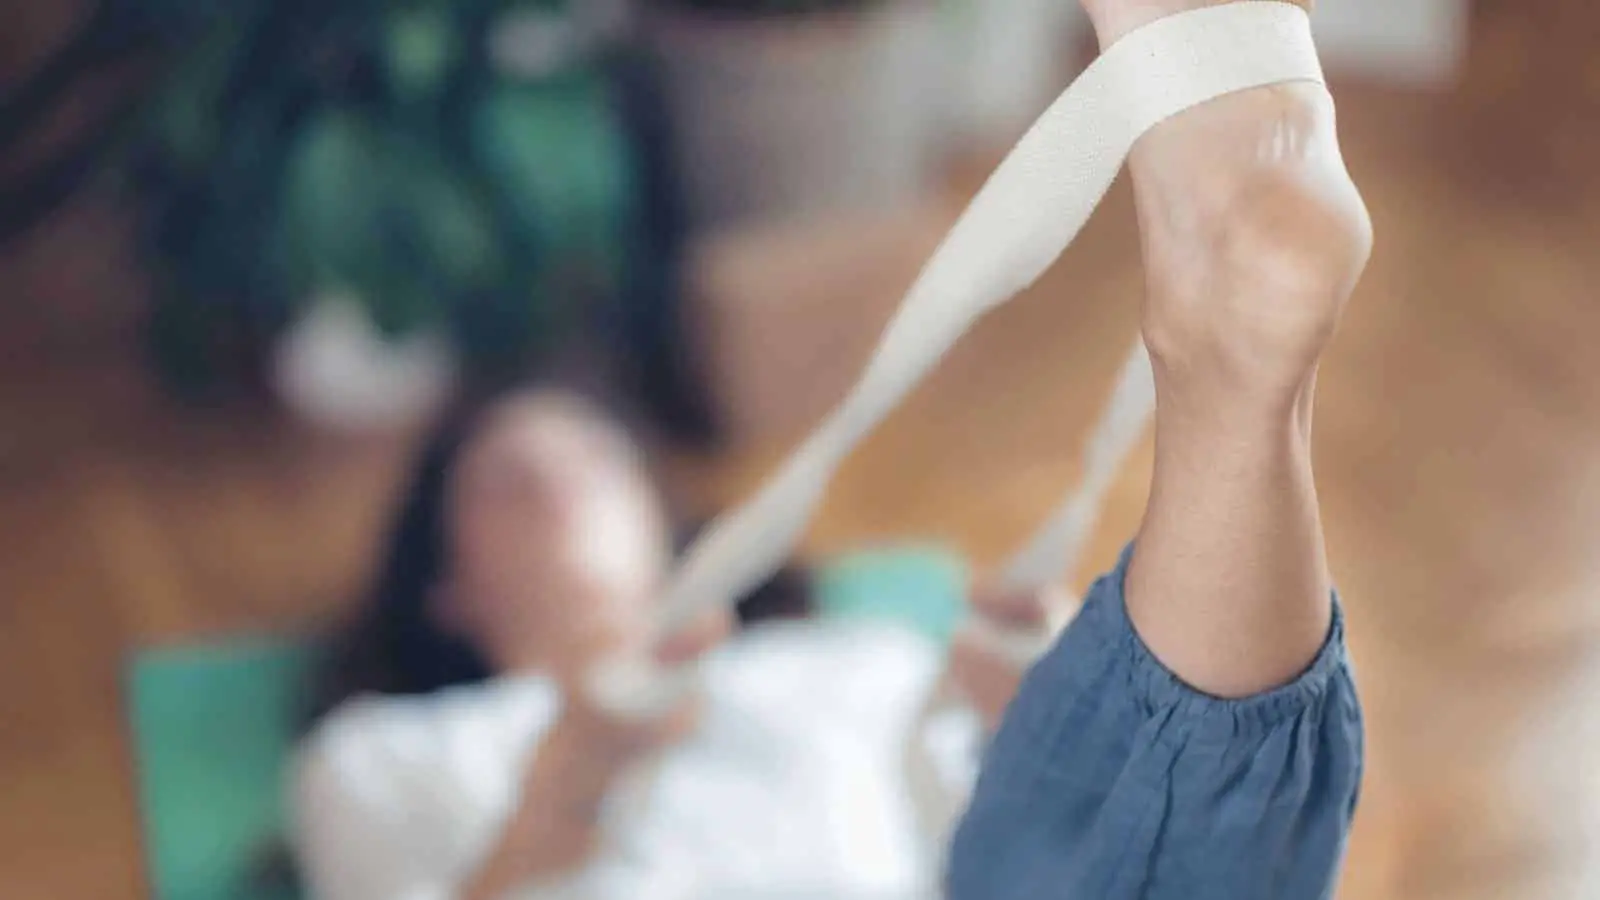
Reclined Hand-to-Big-Toe
The Supta Padangusthasana or Reclined Hand-to-Big-Toe pose helps ease knee pain. It also improves the health and strength of the hamstrings and hip flexors.
This exercise stretches the knee on both sides, without the need for abduction, adduction, or rotation. Depending on your ability, you may find it easier to do this pose with a yoga strap’s assistance.
Doing this pose without a strap requires extreme flexibility and strength. Using straps when doing this pose ease knee pain and help support your joints without added stress.
Technique

To do this pose, you will need to lie on your back. Don’t worry about making your back press flat against the mat. Let your back curve naturally.
Stretch your legs out entirely, with your knees and toes pointing towards the ceiling. Some people like to put a towel or folded blanket behind their head for extra comfort.
Next, exhale and bend your knee, bringing your thigh to your chest and hug. If you’re stretching without the strap, straighten your leg into the air. Now use your hand to pull your leg towards your head.
Modifications
If you are using a strap, place it on the ball of your foot. Pull the belt tight, and stretch from the back of your knee to the heel.
Then, you will need to move the strap to the heel of your foot and hold it with both hands. As you inhale, straighten your knee, pushing your left heel toward the sky. Walk your hands along the strap until your elbows have a full extension. Stretch your back and press your shoulders down into the floor.
Start to pull your leg closer to your head, keeping the leg straight and the back naturally curved. Stop pulling once you feel your back trying to flatten against the mat. Hold your position for five breaths. Then slowly lower your leg back to the ground.
Repeat this process with the opposite leg. Do multiple repetitions of each leg. Start with three sets and work your way up to more as you adjust to the exercise. Try to pull your legs further towards your head each time.
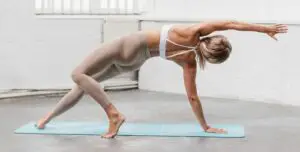
Banana Pose
The banana pose, also called Bananasana, helps ease tension from the pelvis, which helps stretch the hip flexor and alleviate pain in the knees.
Bananasana is also an excellent pose for working the deep muscles in the back, reducing lower back pain, and improving shoulder mobility.
Technique
To perform Bananasana, you start by lying on your back, legs stretched out, so your feet are shoulder-distance apart.
Now, stretch both arms up and behind you. Grab your left wrist with the right hand. Lift so that your head, neck, shoulders, and upper body come up off the mat. Shift your upper body to the right. Do not twist.
Next, move your left leg towards the right side of the mat, crossing the ankle over top of the right foot. You should start feeling stretching along the left side of your body. Hold the position for ten to fifteen breaths.
Return to the starting position. Rest for a few seconds, then repeat the process with the opposite side.
Modifications
If you are just starting with yoga, you may find it too challenging to cross your ankles and hold your wrists. You can work up to this as you practice the pose.
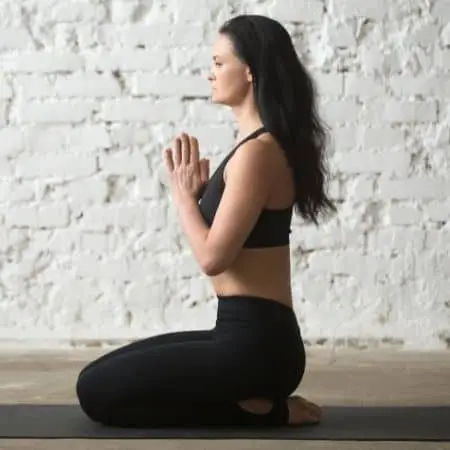
Hero Pose
The Virasana or Hero pose can be challenging for some people with chronic knee pains. If your discomfort is intense, you’ll want to slowly manipulate this pose and work with props to make it more tolerable.
This pose provides unique stretching for the knees and can improve the flexibility of the knees, ankles, and thighs. Plus, it can help improve your posture, which can help reduce pain.
Technique
To do a Hero pose, start in a kneeling position, feet flat on the mat, and your hips positioned over your knees. Keeping your knees together, move your feet apart until there’s a large enough gap for you to sit.
Next, exhale as you lower into a sitting position, your bottom resting on the mat between your feet. Do not sit on your feet, which should point straight back, flat on the floor.
Relax your shoulders down. Place your hands in your lap and hold the pose for as long as you can, preferably a minute.
To get up, put your palms on the floor and lift your bottom. Cross your ankles underneath you and extend into the Staff Pose (Dandasana), which means your legs are straight out in front of you, back straight, hands at your sides.
Modifications
Depending on your pain level, this position may be uncomfortable to try. There are ways you can make it easier to do.
If you can’t lower yourself to sit on the floor comfortably, place a yoga block between your shins. Some people find they need to use two blocks to keep them at a tolerable height.
Or you could use one block and top it with a folded blanket. Keeping your hips above your knees can ease stress and help bring your body back into proper alignment.
Another issue people face with this problem is pain in the ankles or feet when pressing against the mat. To make it more comfortable, place a rolled towel or blanket underneath your feet.
You can also use the Hero pose to provide a good torso stretch by holding your arms parallel to the floor and hooking your thumbs. Then as you inhale, move your arms over your head, palms facing up. Exhale as you go lower.
Yoga Poses to Strengthen Your Knees
These yoga poses will help you increase your knee strength and develop a stronger resistance to injury:
Mountain Pose
The Mountain pose, or Tadasana, is a pose that you will use to prepare for a lot of poses and is the start for any standing pose.
Tadasana focuses on having the proper form and posture. It also helps strengthen the legs, which can prevent knee injuries in the future.
Technique
To perform Tadasana, you start by standing with your big toes touching. Some people keep their feet close together, while others have a slight gap between the heels to prevent your ankles from hitting.
The first step is to lift your toes and fan them out. Keeping them spread gives you a wide, stable base. Now plant your feet into the floor, spreading your weight over the entire surface. Flex your quadriceps upwards, so your kneecaps rise.
Next, rotate your thighs inward. Some people prefer to use a block to make this easier until you’re used to the feel and process of maneuvering different muscle groups. The block should have the short end facing front and positioned between the upper thighs.
Tuck your tailbone while working your glutes. Keep your abs tight. Pull your shoulders back, and then push them down. Your shoulders should rest even with your hips and ankles. The chin should be parallel to the floor.
Hold for five to ten breaths. Relax. Repeat the process three to five times, remembering to work your thigh muscles with or without the block.
Modifications
If you have balance or immobility issues, you can keep your feet hip-width apart instead of having them close together. You want to keep your knees soft and slightly bent in this pose, depending on your knee discomfort.
Supported Chair Pose
Some people move from the Mountain pose directly into the Chair pose, or Utkatasana. It’s also referred to as the Awkward or Fierce pose. With this position, you bend at the knees, pretending that you are sitting in a chair.
But when you have knee pain, you may not have the strength or capability to support your weight free form.
Many therapists recommend performing a Chair pose while leaning against a wall for support for people who have knee injuries.
The chair pose works the abductors, hamstrings, and quadriceps. And it can also improve blood flow to the lower body, which can help with range of movement.
Technique
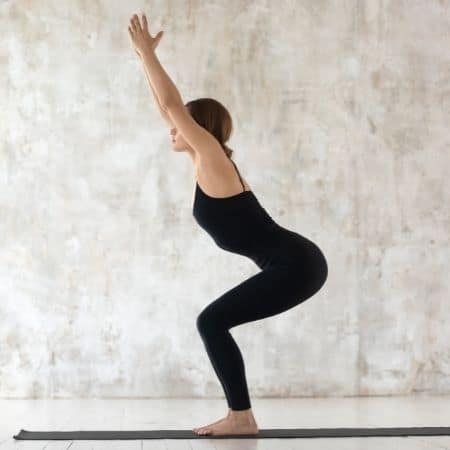
To perform a supported Chair pose, you will stand with your back against the wall. Your feet should be even with your hips. Now you will slide down the wall until your knees are parallel with your ankles.
Your hands can rest on your thighs or extend above your head for a deep stretch. Hold your pose for a few slow, deep breaths. Then return to your starting position.
Repeat the Chair pose for three to seven times, depending on your tolerance. As you build strength in your legs, you can hold your pose longer during each rep. Aim for five breaths per repetition.
Modification
You may find that using a yoga block can help keep the proper form and ensure you’re working the right muscles.
Tuck a block between your upper thighs or move into doing the Chair pose right from completing the Mountain pose.
Supported Bridge Pose
The Supported Bridge pose, also called the Setu bandhasana, is an excellent yoga pose to help align your knees. This position can also strengthen the back, hamstrings, and glutes.
For this position, you will need to be in a laying down position, flat on your back. To reduce discomfort, place a yoga or workout mat underneath you for support.
To make this position more comfortable when dealing with knee pain, you’ll need to have a block or wedge that you can use to offer support.
Technique
To perform a bridge pose, you will start by lying flat on your back with your knees bent. Now, move your feet inward towards your butt until you can brush your heels with your fingers.
Now, walk your feet out until they are even with your hips. Place your block in the gap of your feet, resting horizontally (long ways). Your feet will press against this prop to help keep the proper form.
Next, pull your stomach in towards your spine while pressing your lower back against the ground. Curl your tailbone in and lift from the floor. Try to raise your hips as high as you can without breaking your form. Your knees should stay hip-length apart, parallel with the ankles. Hold for ten breaths.
To return to your original form, relax the upper back first, then the mid-back, before releasing the lower back and butt to the floor. Repeat this exercise three to five times.
Extra Challenge
To add extra stretching of the chest, roll the shoulders and link your hands together underneath. Take a few deep breaths while maintaining this pose.
You can also put the block between your thighs to strengthen your muscles, which helps ease knee and hip pain and keeps everything aligned.
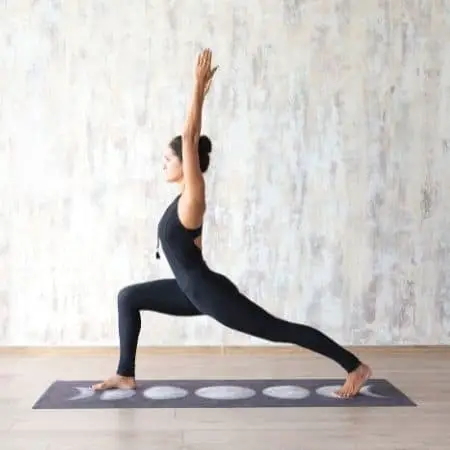
Warrior Poses
Warrior poses, or Virabhadrasana 1 and 2, help build up leg strength and encourage correct alignment. The Warrior poses can also strengthen the inner quad muscles—the vastus medialis, reducing the stress your kneecaps suffer through daily use.
Warrior 1: Technique
To perform the Warrior 1 pose, you start with the mountain pose. Now, move your left foot back a few feet, so it’s at a 45-degree angle. If possible, you want the left arch to line up with the right heel. But if you need to spread your feet wider for a better balance, that’s okay too.
Now, with your chest and hips facing the front of the mat, bend your right knee into a 90-degree angle. Your knee should be over your ankle, toes pointing forward.
Plant your back foot into the mat, keeping your spine straight and stretched out and your core tightened. Inhale as you move your arms upward, along with the ears, palms facing inwards. Hold your position for ten breaths, then switch to the opposite side.
How to Modify When Using Yoga Blocks
Here’s a quick step-by-step process to modify the Warrior pose with blocks:
- Place a block lengthwise underneath the foot of your bent knee.
- Put another block against the wall, pressing your bent knee against the block.
- Hold this pose to cushion the impact, reducing the stress on your knees.
Warrior 2: Technique
The second Warrior pose also starts with the Mountain pose. Position your foot three to four feet back at a 45-degree slant, similar to Warrior 1. The other knee should bend forward at a 90-degree angle, resting above the ankle but not past. Keep your chest and hips squared to the left side.
Next, root through your ankles while lifting through your arches. Your arms should be at your sides, shoulder height, parallel with the floor, and aligned over your legs.
Holding your palms down, reach out fingertip to fingertip. Exhale a breath and bend your front knee, so it’s resting over the ankle, the shin perpendicular to the floor.
Drop your hips so your front thigh becomes parallel. The front shin should stay vertical. You may need to widen your stance. Put pressure on the outer edge of your back foot, keeping it straight.
Hold for one minute. Then, inhale as you put weight on your back foot and straighten the front. Drop the arms. Turn to the opposite side, so your legs are in the reverse position. Repeat the process with this side.
How to Modify When Using Yoga Blocks
Let’s review a quick way to use blocks with this pose:
- As explained by Yoga International, place your mat against the wall.
- Perform the Warrior II pose with a block between your bent knee and the wall.
- Hold this pose for an extended time to reduce knee pain.
Note: Although it might be tempting, don’t lean on the wall. The goal is to stretch, not rely on the wall for stability (other than your knee’s block)
King Arthur’s Pose
King Arthur’s Pose (a variation of Virabhadrasana) is a floor pose that targets the quadriceps (knee extensors). You need to use caution when using this method, as it can cause overstretching, which can increase knee pain. Start at 50% or less.
You will need some accessories to complete this pose. Before beginning, make sure you have a blanket and two blocks.
Fold the blanket and put it against a wall, and position your blocks on each side.
Technique
To start The King Arthur’s pose, you need to begin in the base pose, Tabletop (Bharmanasana), back towards the wall. This position means you will be on your hands and knees.
Next, bring your right leg back so that the shin and top of the foot press lightly against the wall behind you. The left foot should step forward into a Low Lunge position (Anjaneyasana), with the knee aligned over the heel.
Modifications
If you want a deeper stretch, move your hands to your thigh and slowly lean back towards the wall.
You can also place your hands on the blocks and angle your hips forward while lifting your chest. Hold for 5 to 10 breaths, then switch sides.
In Closing
Certain yoga poses are great for reducing knee pain and making your knees stronger. An excellent solution to reduce joint pains such as bad knees. When performed regularly, yoga poses can strengthen essential muscles in the legs, helping prevent knee injuries.
Here’s a quick recap of the post:
- Yoga is designed to stretch and strengthen joints and muscles, making it great for sore knees.
- Using props, such as kneepads and dense foam mats can make a world of difference.
- Practice the supported chair pose, King Arthur’s pose, and hero post to soothe knee pain.
- Deep breathing and slow movements will prevent your knee pain from worsening.
- Rollers, straps, and blocks can cushion the movements associated with yoga poses.