There are many very challenging poses within yoga. Even if you have mastered the beginning poses, you would still have a long way to go. One pose that many people find challenging is the crow pose.
The crow pose is pretty challenging as it involves putting your body’s full weight on your arms. You can do several poses to strengthen your muscles in preparation for it, but how long it takes for you to master the crow pose depends on your level of fitness, flexibility, and amount of practice.
If you are interested in learning how to master crow pose, read on. You may not be able to master it right away, but as long as you know the steps, you will be able to work towards it over time.
What Is the Crow Pose?
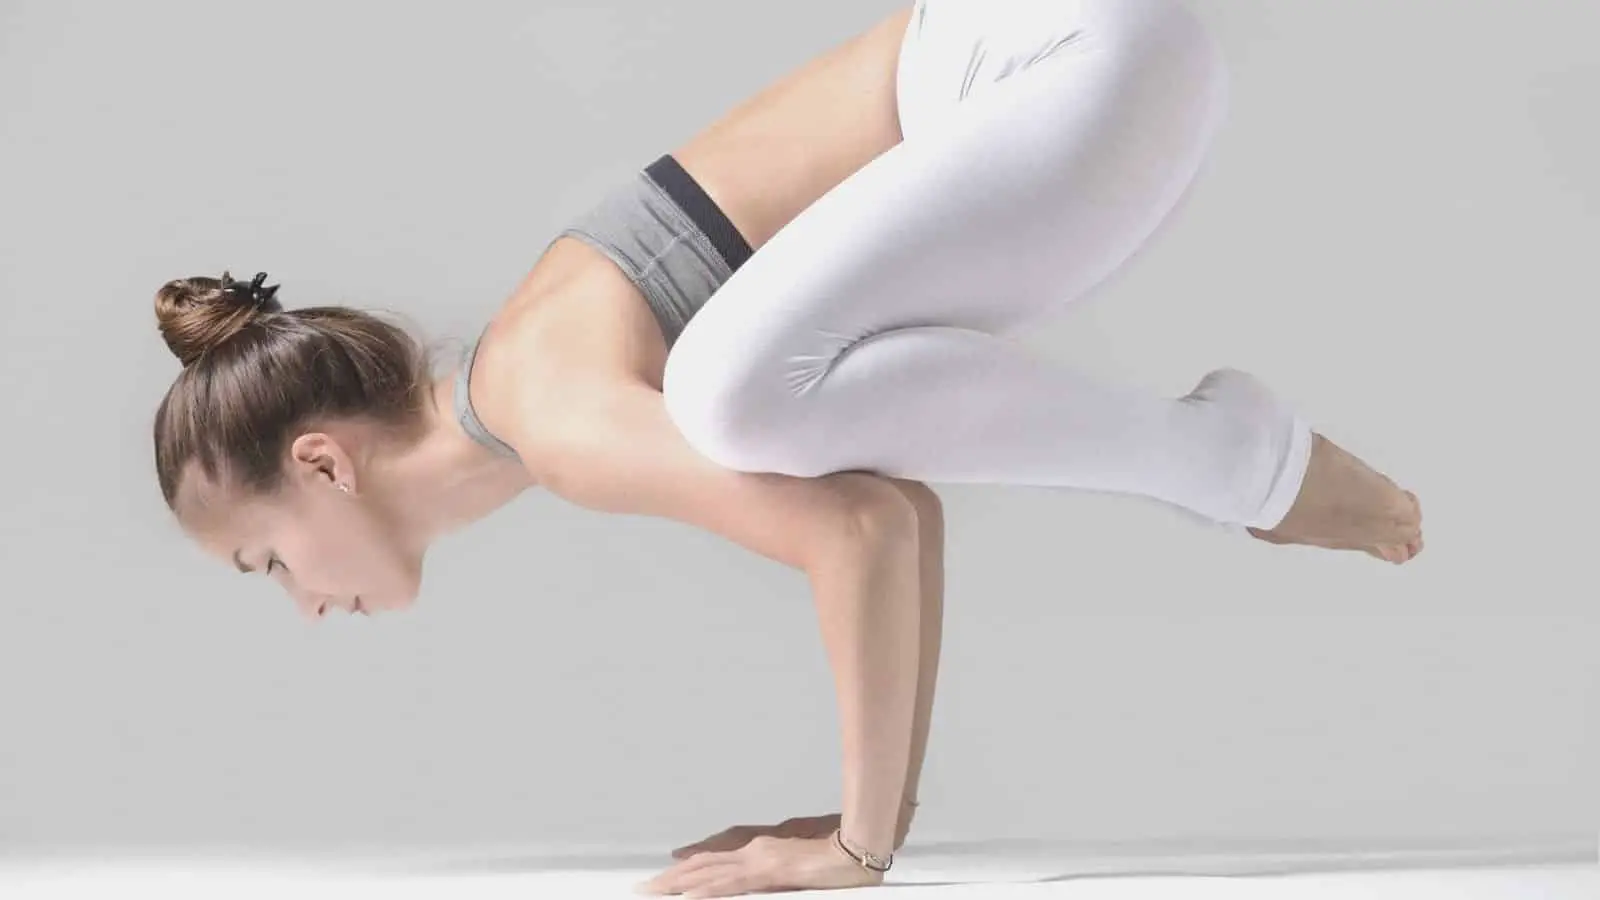
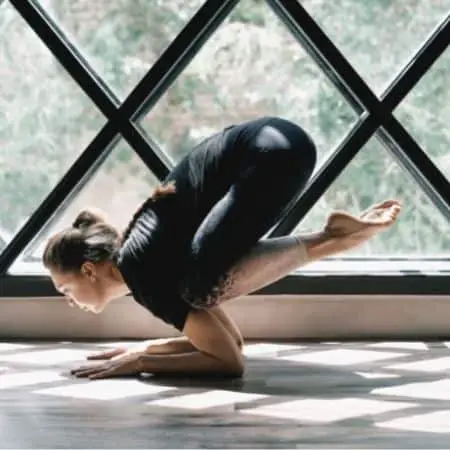
The crow pose, also known as kakasana in Sanskrit, is a relatively challenging active yoga pose. The practitioner starts out by squatting down and putting his or her palms flat on the ground directly under the shoulders and between the legs.
The person is then to shift the entire body’s weight onto the palms, with the knees balancing on the backs of the arms on top of the bent elbows.
Many people use the terms “crow pose” and “crane pose” interchangeably. However, the crane pose (known as bakasana in Sanskrit) is actually even more challenging. In order to do the crane pose, you can start with the crow pose and then straighten your arms so that your knees are not balancing on top of your bent elbows anymore.

How Long Does It Take to Master the Crow Pose?
There are so many factors that go into how long it will take for you to master the crow pose. Your current level of physical fitness, flexibility, and the amount of practice you are willing to put in are all a part of it. Some people can master this pose in days or weeks, while others can take over a decade to do the same.
Some people will be able to work up to this challenging pose with only a few short steps, while others will have to master a series of less complicated poses in order to even start attempting it. Whatever your situation, just work at your own pace without pushing yourself too hard, and you will master it when you are able.
How Can You Make the Crow Pose Not Hurt?
Because the crow pose involves you putting the full weight of your body on your arms, it can lead to tired, aching arms. One way that you can minimize the pain is to increase your arm strength. You can either do conventional muscle-building exercises, such as lifting weights, or you can do a variety of yoga poses that will lead to stronger and more toned arms.
A common source of pain is the fact that the bony parts of the knees are pressing into your arm during this pose. One way to circumvent this is to position the insides of your knees on the outsides of your upper arms. However, you should realize that some pain is likely inevitable with such a challenging pose. Just make sure that you aren’t overdoing it to the point of injury.
Benefits of the Crow Pose
There are a few benefits that come with learning how to do the crow pose. It may seem like just one pose that isn’t necessarily that important, but it is definitely worth trying if you are physically able. Just like any other pose within yoga, you would be surprised what it can do for you.
Physical Benefits
The crow pose is a great full-body workout. It forces you to work your arms and your core muscles. It also strengthens other parts of your body, such as your legs, upper back, and wrists.
Many people find it easier to push their legs up against the backs of their arms to prop themselves up, but you get the true full physical benefit of this pose when you use and engage your core as much as possible.
The crow pose also tones up your abdominal organs and opens up your groin region. It will stretch your upper back, increase the elasticity and flexibility of your spine, and even help minimize heartburn and acidity.
Mental Benefits
When you see pictures of other people doing the crow pose, it probably looks a lot more intimidating than it really is. When you start to practice it, you will see that it is not quite that bad, even though it is still challenging.
The challenge mostly lies and focuses on lifting instead of falling. You are supporting the entire weight of your body on just your hand, which requires you to face a very real fear. Many people are scared of falling to the ground and crashing down on their faces with all their weight.
The crow pose encourages you to be very aware of your body and to hone in on the mind-body connection while you are up in the air. To successfully do this pose, you need to both hold on and let go. You need to accept your fears and venture into this journey with courage.
Spiritual Benefits
The crow pose encourages you to establish an inner focus as well as a concentration on the present moment. The pose is actually a symbol of justice and longevity. It is supposed to strengthen your second chakra, also known as the sacral chakra. If you truly master this pose, it will help to connect you with your emotions and creative energy.
Poses That Can Help You Prepare for the Crow Pose
If you are having trouble with the crow pose on its own, there are a few somewhat easier poses that can help you warm up and strengthen your muscles in order to be more capable of the crow pose.
Cat Pose (Marjaryasana)
This isn’t intuitive to everyone, but the spine position you need to do for the cat pose can help you with the crow pose. You do the cat pose with a deeply rounded spine, just as you need to be able to have in the crow pose.
To do this pose, follow these steps:
- Get down on all fours, with the wrists under the shoulders and the knees immediately under the hips.
- Exhale and then press firmly down on your palms.
- Try to move your navel towards your spine in order to make your lower and middle back round.
- Turn your head in the direction of your navel.
- Hold this pose for ten breaths.
Lizard Pose (Utthan Pristhasana)
Lizard pose will really help you with your hip flexibility, which is very important for crow pose. This will help you open up your hip girdle. Additionally, it will help you with your adductor strength. Your adductors are muscles in your inner thighs. Once you work them, they will move your legs towards the midline of your body.
To do this pose, follow these steps:
- Start off in the downward-facing dog position.
- Move the right foot in a forward direction so that it is adjacent to the outer portion of the right hand. Then, descend the back knee towards the floor.
- Make your hips relax toward the ground. Focus on lengthening your spine.
- Move the right knee and right thigh towards your body’s midline, and push them up against the right shoulder.
- Push the right shoulder up against the right thigh with the same amount of energy that you did when you moved your thigh.
- Hold this pose for ten breaths and then switch to the other side.
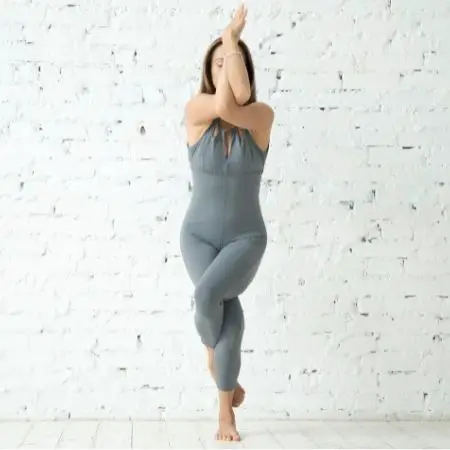
Sleeping Eagle Pose (Garudasana Variation)
This pose creates a rounded spine, activates your adductor muscles, and improves your balance, which is important for the crow pose.
To do this pose, follow these steps:
- Start off in mountain pose and find your Drishti (focused gaze).
- Put a bend in your knees very deeply so that you sink into the chair pose.
- Shift all of your weight over to the left leg. Then, stand only on the front part of the right foot.
- Once you have achieved a balance, move the right foot up off of the ground. Then, move your right leg so that it is crossed over the other leg.
- Move the toes on your right foot to the floor (or for more of a challenge, keep these toes lifted or move your right foot so that it is wrapped behind your left calf).
- Push your legs in the direction of the midline of your body, which will activate your adductors.
- Cross your right arm over the other arm, giving yourself a hug. Make the backs of both your palms touch, or have the fronts touching in what is known as the Eagle Bind. Given that you choose to have your front palms touching, move your elbows towards the ceiling and push your forearms in the direction opposite to your face.
- Inhale and make your spine longer. There should be a distance between your head’s crown and your tailbone.
- Exhale and suck your navel towards your spine, make your back round, and move your elbows towards your knees.
- Hold this pose for ten breaths, and then release it before you switch sides.
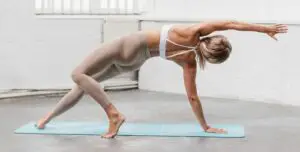
Warrior III (Virabhadrasana III)
Counterbalance is one of the key aspects, and likely one of the most challenging, of the crow pose. Warrior III is very good for this purpose.
To do this pose, follow these steps:
- Start in a mountain pose. Then, do your best to find your Drishti.
- Move your palms so that they are anterior to your heart.
- Move all your mass towards your left leg, and stand on the front part of your other (right) foot without getting on your tiptoes.
- Once you feel like you can achieve a balance, move your right foot up off of the floor. Then, move your leg behind you.
- Let your torso lean forward naturally in order to counteract the mass of your leg that is behind you.
- Extend your right leg even further back until both the torso and leg are in an orientation that is parallel to the ground.
- Flex the back foot. Then, stretch the arms over your head so that they are around your ears.
- Move your leg backward and reach in the forward direction with as similar energy as possible on both sides.
- Hold this pose for ten breaths, and then release before you switch sides.
Reclining Crow Pose (Supta Bakasana)
When you do this posture, you will be working with all the fundamental aspects of the crow pose. The only difference is that you will not be working against gravity. It helps to practice on your back so that you can master all the muscular movements without needing to worry about gravity for now.
To do this pose, follow these steps:
- Lie down on your back, and move your knees towards your chest.
- Reach your arms straight up, and extend your wrists as far as you can.
- Move your knees apart from one another, and use your core strength to bring them towards your underarms.
- Squeeze your legs towards your upper arms, activating your adductor muscles.
- Move your navel toward your spine and round your back. Lift your head and chest off of the ground.
- Hold this position for ten breaths and then release. Repeat it twice.
How to Do the Crow Pose
In order to master the crow pose, you need to follow a series of steps. If you find that you are not able to go through all of the steps as outlined below, there are also modifications that you can try to work up to the proper crow pose.
Squat on Your Mat
Start out by squatting down on your mat with your feet about shoulder-width apart. Move your torso forward so that it is in between your thighs. Then, put your hands onto the mat, palms facing down, in front of your feet. These should also be about shoulder-width apart. Make sure that you spread all of your fingers evenly apart.
Transfer Weight
Now, transfer your weight forward so that it is on your hand. Lift up your heels, with your toes still touching the ground. Try to move your knees as close to your underarms as you can.
Bend Your Elbows
Your elbows should still be in line with your shoulders. Keep them in the same plane with one another as you bend your elbows a little bit to create a shelf for your knees. Keep your eyes forward on the ground so that you are looking at the space right in front of your hands.
Engage Your Core
Keep leaning forward even more. As you do this, scoop your abs inward and round your back. You will really need to engage your core in order to balance yourself in this pose. Lift one of your feet off of the ground, and try to balance yourself as well as possible.
Lift Off Completely
Now, slowly lift your other foot off of the ground. Lift your hips into the air, and stay as balanced as possible.
Continue lifting your torso and your hips, pitching your weight forward. Move your heels inward towards your buttocks. If you can, touch your big toes together.
Make sure to keep your core as engaged as possible. This way, if you fall out of balance, it will soften the landing on your feet. It might also be a good idea to put blankets or small pillows on the floor where your head might land in case you happen to fall forward.
Alternatively, you can practice right in front of a wall with the top of your head touching the wall so that falling forward can’t happen.
Through all of this, make sure that you continue to breathe steadily. If you are able to maintain your balance, you can try to straighten your arms and lift up your hips and legs even higher to attempt the crane pose. If you can’t do this, that’s okay. Just do the best that you can to master the crow pose.
Modifications as Stepping Stones
Not everyone can do the crow pose on the first try, and that is perfectly okay. You can work up to it using modifications. If you don’t have the core strength to do this pose, what you can do is rest your shins on the shelf of your upper arms. You can bend your elbows out to your sides and then rest the weight of your body on your arms.
It might also help to start with your hips higher than they technically should be so that you can use the force of gravity to help you move forward into your arms.
One of the modifications of crow pose could be Half Crane Pose (Ardha Bakasana). Place your forearms on the floor, left your lower body and try to keep the balance. This is a good way to start and in case it is still challenging, place a yoga block under your feet. Rest in the pose and breathe, knowing that with time you will be able to perform the actual crow pose.
Alternatively, you can place a block under your feet before you lift your feet off of the ground so that your body is a little bit higher and has to do less work to reach crow pose. If you have blocks under your shoulders, this can help you balance as well, while your arms get stronger with practice.
However, there are some ways that you should not modify this pose. Don’t bend your elbows to the side or turn your hands inwards. This might appear to be easier at the beginning as it can give you traction and help you ease into the pose. However, it can also easily lead to injuries in your wrists and shoulders.
Contraindications for the Crow Pose
There are also certain people who should not attempt this pose since they could be at higher risk of injury.
This includes yoginis who are pregnant. The chance of falling down, particularly when you are first attempting the pose, is fairly high. Even one fall can potentially lead to a miscarriage. Women who experience heavy periods may also want to avoid the crow pose as it puts a lot of stress on their pelvic muscles.
Hip injuries also make it a bad idea to try this pose. If you have injuries in the wrists and/or shoulders or have carpal tunnel syndrome, you should avoid it as well. It is likely also a bad idea to attempt this if you have weak wrists in general or are dealing with inflammation.
Practicing this pose also requires quite a bit of focus. If you aren’t mentally prepared, there is more of a risk of you getting injured. Additionally, if you have an anxiety disorder, you might have a harder time doing this pose.
People who suffer from migraines might want to avoid this pose as well because this involves your head being lifted towards the air. With your body being in the position that it is during crow pose, this can put a lot of pressure on your brain, which can lead to serious migraine attacks in some cases.
Conclusion
As you can see, although the crow pose is challenging, it is well worth the effort to learn. It comes with a variety of benefits, not only physical but also mental and spiritual. In addition, you can simply feel proud for being able to push yourself into a challenging position.
If you want to push yourself, even more, you can try moving into the crane pose and going back and forth between the two.
If you are not ready to do this just yet, that is okay, too. Work at your own pace, and you’ll get there eventually.